
Files
Creator’s ZIP folder of all the completed files. The ‘run.py’ file is the home base where the game is played.
This is my (Grant’s) version of the same files, denoted by the ‘1’ in the names. Neither is perfect, we both have unique flaws. I recommend downloading both versions and experimenting with how the games run.
This is a ZIP folder of the codes for each milestone of the game’s creation. These are based on my version, not the creator’s. Make sure your indentations are uniform when pasting this into your IDE.
Troubleshoot tips: While the non-Python files are in the zip folder, make sure they’re also in the home base folder that the zip folder lies in. You’ll likely have to copy and paste them.
Intro & Overview
So I first did Pong as a way to practice Python outside of random exercises. I learned a little but it still left out a lot of features of the language. So to take it up a notch, I’m remaking Pacman entirely in Python. This involves every feature of the language from functions to loops, libraries, and dictionaries.
I found this amazing website pacmancode.com that walks through the process of coding the game in Python. I couldn’t find the creator’s name, but I commend him for making this. This is what educational content creation is all about: create what you wish had existed when you were starting out.
Ima be straight with yall, this isn’t perfect. It’s not fully functional arcade-ready. Even running the code the creator made still has some issues. The characters are misaligned, the button feedback is stiff, and a few other things. I just did this to get more practice in Python. I have more important things to do with it, so I wasn’t gonna spend all my time correcting each and every error. So again, this won’t be a polished version, but the base will be there. I may revise this later, but don’t take it too serious.
So first I’ll give yall an overview of the sections we’ll be going through. We’ll start with the game area, which is the maze. We’ll set up a bare-bones version of Pacman and his basic movement. Then we’ll move on to the nodes that will make up the maze. This is the most tedious part of the process. Luckily it’s in the early stages so we’re getting this out the way. Then we’ll set the features of the maze, like its borders, portals, and pellets. We’ll be connecting these features to Pacman during this part too. The hump of this project is the ghosts. We’ll spend a chunk of time on them. Creating them, setting their different chase styles, and setting the modes of the game which include Pacman eating a power pellet, followed by him eating a ghost, the short time when a ghost is eaten and rushes back to its home base, and dying from a ghost. After that, we’ll handle the auxiliary game mechanics like the character’s starting positions, the fruit, Pacman’s lives, pausing, and ending a level. One big thing I couldn’t figure out in time is reviving Pacman after he loses a life. I got his death animation down, but if he loses a life, an error pops up, and it’s too layered to focus on. So I’ll admit this is the main game-breaking flaw I had to leave in. If you’re testing this code and running the game as you follow along, don’t let him die. After that, it’s really all aesthetics from this point on. We’ll be using a pre-made sprite sheet that contains all the images from the original game. Remember some objects actually change shape instead of just moving, like Pacman’s death or the ghosts’ eyes. These are animations, which means you’ll need each frame of the object in a different state. The sprite sheet saves us time from having to create all of that from scratch.
Setup
All you need to set this up is a working computer. Download the Python language from the official site, it’s free. And you’ll only need to install 2 libraries: Pygame (obviously) and NumPy which we’ll be using to add the nodes into a data structure. To install these libraries, open your computer’s terminal, it may be called ‘command prompt’ or ‘PowerShell’, and type “pip install pygame numpy“. This will install both libraries for you. Again, this is all free and takes up little space. You’ll also need an editor to actually type the code into. I used the IDLE that comes with Python when you download it, so that’ll work for you too; just search for the ‘IDLE’ app on your computer. You don’t have to use this one, but any other one is gonna add complications if you’re not already used to it. This is the basic word doc for writing code in Python.
We’re also going to be using many separate files that’ll be imported into each other. So I suggest creating a folder to hold those files.
After going through this whole thing, I have a 3-step heuristic for how Python works: If you want to move an apple, you first have to state that there is an apple, then you have to state there are things you’d like to do with the apple, then you move the apple. Just about any error, outside of spelling or spacing, happens because one of these steps was missed. The ‘init’ method will usually hold the first step. The use of ‘self’ is for the sake of the second step in most cases, and the other methods is where the actual work is done.
Vectors
Starting off, as with any game, there’s the space of the play area. This space is a grid. To get from point A to point B, I would give you 2 sets of information: distance and direction. “Go up 3 blocks, turn right for 2 blocks, hang a left, then stay straight for 5 blocks.”
Create a file called ‘vectors’, and make sure it’s a Python file, which you can tell by it ending in ‘.py’. This first code imports a ‘math’ package to use predefined functions.
import mathclass Vector2(object): def __init__(self, x=0, y=0): self.x = x self.y = y self.thresh = 0.000001
x and y represent the coordinates the vector is pointing towards. As with any initialize (init) function, we start the arguments with ‘self’ and establish them with themselves using a ‘self’ reference.
The arithmetic we’ll be doing is adding and subtracting vectors along with multiplying and dividing vectors by scalars; in that order.
def __add__(self, other): return Vector2(self.x + other.x, self.y + other.y)def __sub__(self, other): return Vector2(self.x - other.x, self.y - other.y)def __neg__(self): return Vector2(-self.x, -self.y)def __mul__(self, scalar): return Vector2(self.x * scalar, self.y * scalar)def __div__(self, scalar): if scalar != 0: return Vector2(self.x / float(scalar), self.y / float(scalar)) return Nonedef __truediv__(self, scalar): return self.__div__(scalar)
For the first 2, addition and subtraction, ‘self’ is the current Vector2 instance, and ‘other’ will be whatever other number we put in the equation. The next one ‘neg’ makes the coordinates negative. The next 2 ‘mul’ and ‘div’ do their respective operations. They’re set to scalar which is standard arithmetic when dealing with vectors. The ‘div’ sets its scalars to be floating-point (allowing decimals) to ensure precision.
The regular ‘div’ is for Python 3 and the ‘truediv’ is for Python 2. Ensuring this can play on the current and previous versions.
This method checks for equality between 2 vectors. In scientific computing, 3 and 3.000001 are usually considered as different, but they can suffice as equal for this case Our ‘self.thresh’ variable is the threshold tolerance for the biggest difference the equality checker will allow. We subtract the 2 values to see if the difference is smaller than our threshold value. The ‘abs’ is what calculates the absolute value of the number it’s passed.
def __eq__(self, other): if abs(self.x - other.x) < self.thresh: if abs(self.y - other.y) < self.thresh: return True return False
Here we have 2 magnitude methods. ‘magnitude’ returns the actual length of the vector which requires a square root (which is why we had to import the ‘math’ package). ‘magnitudeSquared’ is the method we’ll be calling throughout the game since it does the squaring for us.
def magnitudeSquared(self): return self.x**2 + self.y**2def magnitude(self): return math.sqrt(self.magnitudeSquared())
This string method doesn’t have any functionality for the game. It’s used to print out the vector and make it more accessible. This is for organizational purposes.
def __str__(self): return "<"+str(self.x)+", "+str(self.y)+">"
This ‘copy’ method will copy a vector so we get a new instance of it. The other 2 methods convert our vector into a tuple and an int(eger) tuple which will make the code cleaner for later.
def copy(self): return Vector2(self.x, self.y)def asTuple(self): return self.x, self.ydef asInt(self): return int(self.x), int(self.y)
Blank Screen
We store all of our constants (values that don’t change) in one file we’ll call constants. Make sure it’s still a Python file too.
TILEWIDTH = 16TILEHEIGHT = 16NROWS = 36NCOLS = 28SCREENWIDTH = NCOLS*TILEWIDTHSCREENHEIGHT = NROWS*TILEHEIGHTSCREENSIZE = (SCREENWIDTH, SCREENHEIGHT)BLACK = (0, 0, 0)
Our next lines serve as an entry point into our game. We create a run.py file that’ll be the main one we use to run the game. Every other file will be imported into this one.
Then we create a GameController class followed by a Pygame initialization, defining the screen using the values from the constants file, and calling a method that sets up the background (which we haven’t created yet). In run.py
import pygamefrom pygame.locals import *from constants import *class GameController(object): def __init__(self): pygame.init() self.screen = pygame.display.set_mode(SCREENSIZE, 0, 32) self.background = None
Next we set the background color to black.
def setBackground(self): self.background = pygame.surface.Surface(SCREENSIZE).convert() self.background.fill(BLACK)
We’re gonna set the ‘start game’ and ‘update’ methods to be used later.
def startGame(self): self.setBackground()def update(self): self.checkEvents() self.render()
Then we set the ‘checkEvents’ method for quitting the game. Without this, the X wouldn’t do anything. Yes, you have to manually tell a program that you will want to close it at some point. The ‘render’ method is to initialize the drawings we’ll be doing. In run.py
def checkEvents(self): for event in pygame.event.get(): if event.type == QUIT: exit()def render(self): pygame.display.update()
This block will be at the very bottom of the run.py file. The ‘if’ checks if the script being run is the main program. The ‘game’ variable after that creates an instance of the GameController class. Again, if you want to work with something, you have to establish it, and then tell it you want to work with it. This takes care of the second part.
The ‘game.startGame()’ calls the ‘startGame’ method on the ‘game’ object; calling it to be used. Below that is an infinite loop for the ‘update’ method that continually advances the game through whatever state it needs to.
class GameController(object): ... if __name__ == "__main__": game = GameController() game.startGame() while True: game.update()
At this point, when you run the run.py file, a blank pygame screen should pop up.
Basic Movement
This part takes a bit of physics. The equation s(Δt) = s0 + vΔt + ½*aΔt2 represents one-dimensional motion. s0 is our current position, regardless if it’s x or y. V is our velocity which is speed and direction. s(Δt) is our new position. Δt is the time it’ll take to get to this new position. a is the acceleration of an object as it’s moving towards that new position. In this case, anything that’s moving in the game is either moving at full speed or not moving at all. Acceleration entails speeding up or slowing down, which isn’t a factor in this game. That said, we can set our acceleration to 0 since it’s not involved in the mechanics. We can now cut out everything after that second plus in the equation and simplify it to s(Δt) = s0 + vΔt.
So to calculate our new position, all we need is our current position, the direction and speed we want to move in, and the time it will take to get there. That’s 3 simple variables. We’re gonna handle some timing issues later on.
Next we initialize a time clock at the end of the ‘init’ method of the GameController class. In run.py
def __init__(self)... self.clock = pygame.time.Clock()
Next we’re adding this ‘dt’ (delta time) variable as the first line of the ‘update’ method which returns the amount of time that has passed since the last time this line was called. 30 is the frame rate. We divide it by 1000 so the result is in seconds and not milliseconds. Overall, this is the game’s time tracker. When we want to manipulate how long certain things last, like the bonus fruit or the ghosts’ vulnerability, this variable helps the game recognize the passage of time so it knows how to mark when something should occur. This is placed in the ‘update’ method since the game will continually have to do this.
The 2 bottom ‘self’ statements were already there. We’re adding the ‘dt’ variable.
def update(self): dt = self.clock.tick(30) / 1000.0 self.checkEvents() self.render()
Next we’re defining our constants starting with Pacman’s color, he’s yellow, which is a mix of red and green. So we set those values to 255 and leave blue at 0.
YELLOW = (255, 255, 0)STOP = 0UP = 1DOWN = -1LEFT = 2RIGHT = -2PACMAN = 0
With those in place, we can now draw the man himself. We’re creating a new file called pacman.py for this.
We import pygame of course. The ‘pygame.locals’ line is a module within Pygame that’ll recognize and operate certain keywords when we use them. The asterisk after that is to import all the properties of this module. Otherwise, when we use them, we’d have to put ‘pygame.locals’ before each one, which is tedious. This has to be manually done since Pygame is a big library with too many modules to import all at once. And of course, we import the Vector2 class from the ‘vector’ file and bring over all of the ‘constants’ file.
So we create the Pacman class. The ‘object’ argument tells the class to inherit from a base ‘object’ class. This was standard in Python 2, but automatically done in Python 3. So we could technically leave it out and have it still work.
As with any class, we start with an ‘init’ method to initialize everything. We add these instance variables that will hold the data for his characteristics. We first got his name and his initial position on the game board (which is 200, 400).
This ‘self.directions’ instance creates a dictionary that controls his movement in response to certain key presses. Pacman’s initial direction is STOP since we don’t want him moving unless we say so. In Pygame coordinates, a positive x-vector is right and a positive y-vector is down. So when we want him to move up, when we press the ‘up’ key, his y-vector is set to negative, and vice versa for the down key and moving down. The same applies to left and right.
Part 2
After that, we have a ‘self.direction’ variable that’s set to ‘STOP’. Since this is the ‘init’ method, that means initially, Pacman is stopped.
Speed and color speak for themselves. The radius means we’re making his circle 10 pixels.
In the ‘update’ method, the first line updates Pacman’s position based on his current speed and direction, while also accounting for the passage of time (dt). Again ‘self.position’ is his starting position (200, 400). The other side of the equation calculates his new position and compares it to the starting.
We then set a ‘direction’ variable to check for the key that was pressed. To which that is then set by ‘self.direction’. Essentially, ‘direction’ starts at STOP, which is nothing, yet as we go on (which is the function of the ‘update’ method), the variable updates to the respective direction of the key that was pressed.
import pygamefrom pygame.locals import *from vector import Vector2from constants import *class Pacman(object): def __init__(self): self.name = PACMAN self.position = Vector2(200, 400) self.directions = {STOP:Vector2(), UP:Vector2(0,-1), DOWN:Vector2(0,1), LEFT:Vector2(-1,0), RIGHT:Vector2(1,0)} self.direction = STOP self.speed = 100 self.radius = 10 self.color = YELLOW def update(self, dt): self.position += self.directions[self.direction]*self.speed*dt direction = self.getValidKey() self.direction = direction
We just called the ‘getValidKey’ object. Now we have to define its entailments to check for which key the player is pressing. Each key returns the direction it corresponds to. These are all ‘True/False’ Boolean values. Whichever one turns ‘True’ is the one that is returned. If none of the keys are pressed, and Pacman hits a wall, it defaults to ‘STOP’.
def getValidKey(self): key_pressed = pygame.key.get_pressed() if key_pressed[K_UP]: return UP if key_pressed[K_DOWN]: return DOWN if key_pressed[K_LEFT]: return LEFT if key_pressed[K_RIGHT]: return RIGHT return STOP
Now for the actual drawing. We initialize it with the ‘render’ method. The ‘self’ argument refers to Pacman himself and ‘screen’ is where we’re placing him. For the ‘p’ variable, we’re converting ‘self.position’ to integers, hence the ‘asInt’ method. We do this because coordinates are stated as floating-point numbers, meaning decimals. Converting these to integers helps us keep Pacman’s position precise. And lastly we use the ‘pygame.draw.circle’ method which, you guessed it, actually draws the circle. The ‘screen’ argument obviously puts it onto the screen. The other 3 are Pacman’s characteristics which pertain to his appearance: his color, the ‘p’ variable we just set for his position, and his radius which pertains to his size since he’s a circle.
def render(self, screen): p = self.position.asInt() pygame.draw.circle(screen, self.color, p, self.radius)
Now that we’ve set the Pacman class, we can go back to our run.py file and implement him.
First we import him. The first ‘pacman’ is the file we just came from. The second ‘Pacman’ is the class that holds the man himself.
from pacman import Pacman
We add ‘self.pacman = Pacman()’ to the ‘startGame’ method. ‘self.pacman’ will allow us to call the Pacman class where we defined his characteristics. The ‘Pacman()’ set to it is the actual class.
def startGame(self): self.setBackground() self.pacman = Pacman()
In the ‘update’ method, right under the ‘dt’ variable, we make a call to Pacman’s ‘update’ method passing in that ‘dt’ as an argument, which is its resulting value. This connects the game’s time tracker to Pacman.
def update(self): dt = self.clock.tick(30) / 1000.0 self.pacman.update(dt) self.checkEvents() self.render()
Lastly, we add 2 lines to our ‘render’ method. The ‘screen.blit’ line redraws the background. Otherwise any object that moves would appear to be smearing across the display. The objects need to be erased and redrawn in their new positions.

And the last ‘render’ line is the final touch to put Pacman onto the screen.
def render(self): pygame.display.update() self.screen.blit(self.background, (0, 0)) self.pacman.render(self.screen)
At this point, we have a black screen with a yellow circle we can control with the keyboard.

Nodes
Even though we’ve given Pacman the freedom to move, we gotta add constraints so he only moves within the maze.
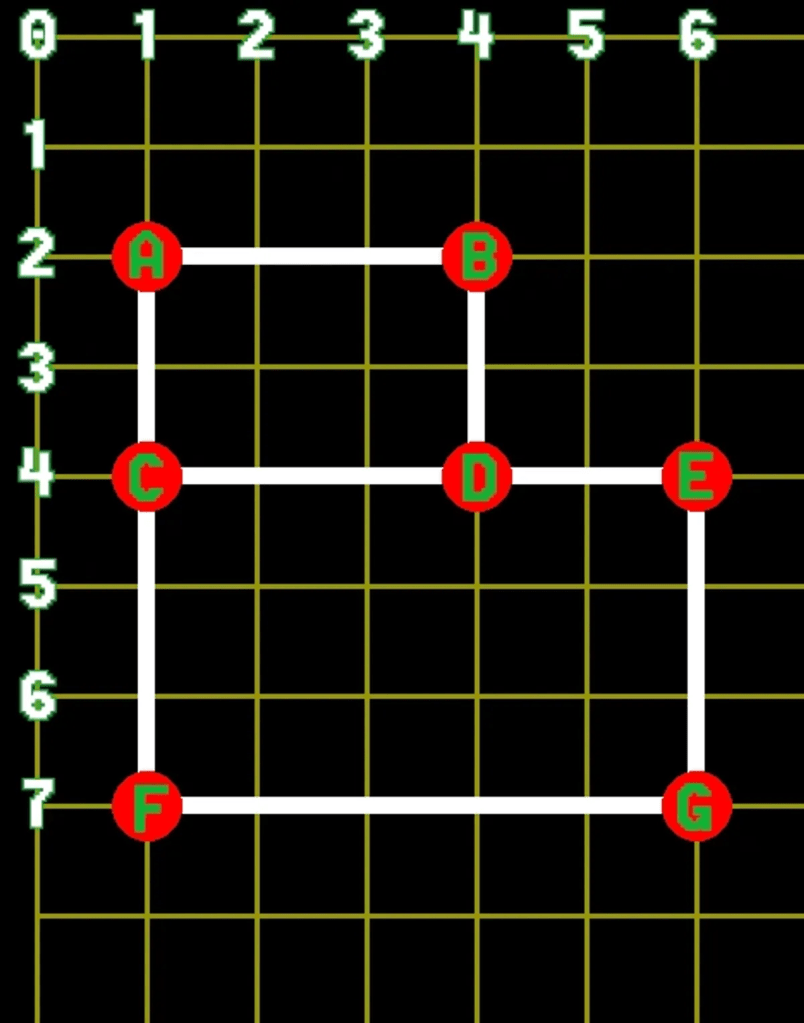
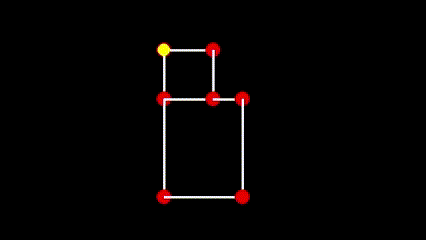
A node by itself is a piece of information. Its most important trait is its position. 2 nodes that are directly linked are considered neighbors. They’re connected by a path. A collection of connected nodes is a map. The maps in this game will only have up to 4 nodes since Pacman can only move in 4 directions. Also note that a node can only have one neighbor per direction.
These are a set of 7 nodes labeled A-G on a grid. We see that node A has 2 neighbors, B and C. Node D has 3 neighbors, B, C, and E. We identify their position by the numbers on the edge.
We’ll add white and red with their RGB values to our constants.py file which will represent the lines connecting the nodes.
WHITE = (255, 255, 255)RED = (255, 0, 0)
We’re also creating a separate node file and adding a ‘node’ class. As always we first import pygame. Then import the ‘Vector2’ class and the ‘constants’ file.
As always, we start a new feature with an ‘init’ method to initialize it. It takes the arguments ‘self’ (which is a given), and x & y to specify the node’s position. The next ‘self.position’ does this again to solidify that the nodes will have a position. The next ‘self.neighbors’ line creates a dictionary with all directions. They’re all set to ‘None’ to state that no node has neighbors when it’s first.
The ‘render’ method is what’ll draw the nodes. It takes the arguments ‘self’ and ‘screen’; same function as it was used for making the Pacman character. The ‘for’ loop is set to iterate through all the keys of the ‘self.neighbors’ dictionary we just set; the 4 directions. The ‘.keys()’ is a method call to access the keys in a dictionary. Per the second line, each iteration checks if the neighbor in the current direction is not ‘None’. If it’s not, that means there’s a neighboring node in that direction. The [n] represents whichever key is the current iteration.
The ‘line_start & end’ variables mark the points of the current node for the start and the neighboring node in the current direction for the end. They’re both converted to tuples since Pygame expects coordinates in tuple form.
The 2 ‘draw’ functions at the end draw the white node circles and the red path lines.
import pygamefrom vector import Vector2from constants import *class Node(object): def __init__(self, x, y): self.position = Vector2(x, y) self.neighbors = {UP:None, DOWN:None, LEFT:None, RIGHT:None} def render(self, screen): for n in self.neighbors.keys(): if self.neighbors[n] is not None: line_start = self.position.asTuple() line_end = self.neighbors[n].position.asTuple() pygame.draw.line(screen, WHITE, line_start, line_end, 4) pygame.draw.circle(screen, RED, self.position.asInt(), 12)
Since we’re dealing with a lot of nodes, we’ll make another class called ‘NodeGroup’. All node objects will be kept in a list.
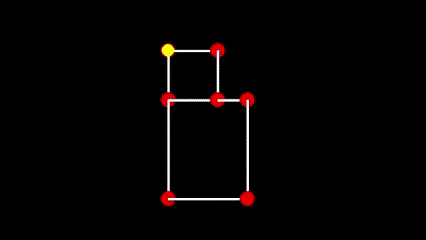
We create the class then create a method ‘setupTestNodes’ to demonstrate how we can manually link the nodes. Each node needs to have its location set upon creation. After that, we link them together adding nodes to the neighbors’ dictionary of each node. Finally, we add all of the nodes to the ‘nodeList’.
When we want to draw all of the nodes we call the ‘render’ method which just loops through the ‘nodeList’ and calls that node’s ‘render’ method.
class NodeGroup(object): def __init__(self): self.nodeList = [] def setupTestNodes(self): nodeA = Node(80 ,80) nodeB = Node(160, 80) nodeC = Node(80, 160) nodeD = Node(160, 160) nodeE = Node(208, 160) nodeF = Node(80, 320) nodeG = Node(208, 320) nodeA.neighbors[RIGHT] = nodeB nodeA.neighbors[DOWN] = nodeC nodeB.neighbors[LEFT] = nodeA nodeB.neighbors[DOWN] = nodeD nodeC.neighbors[UP] = nodeA nodeC.neighbors[RIGHT] = nodeD nodeC.neighbors[DOWN] = nodeF nodeD.neighbors[UP] = nodeB nodeD.neighbors[LEFT] = nodeC nodeD.neighbors[RIGHT] = nodeE nodeE.neighbors[LEFT] = nodeD nodeE.neighbors[DOWN] = nodeG nodeF.neighbors[UP] = nodeC nodeF.neighbors[RIGHT] = nodeG nodeG.neighbors[UP] = nodeE nodeG.neighbors[LEFT] = nodeF self.nodeList = [nodeA, nodeB, nodeC, nodeD, nodeE, nodeF, nodeG] def render(self, screen): for node in self.nodeList: node.render(screen)
Now that we have the NodeGroup class written we can create an instance of it in the GameController class back in the run.py file. First import the ‘NodeGroup’ class.
In the ‘startGame’ method we add 2 lines. The first is creating an instance of the ‘NodeGroup()’ class setting it to a variable named ‘self.nodes’. The second line uses that exact variable and calls the ‘setupTestNodes()’ method for it to perform.
The nodes line in the ‘render’ method is the final touch to put them on the screen. The same as we did with Pacman.
from nodes import NodeGroupdef startGame(self): self.setBackground() self.nodes = NodeGroup() self.nodes.setupTestNodes() self.pacman = Pacman()def render(self): self.screen.blit(self.background, (0,0)) self.nodes.render(self.screen) self.pacman.render(self.screen) pygame.display.update()
At this point, we have a fixed map of nodes along with our mouthless Pacman. He does not yet have any connection to the nodes. They’re a part of the background at this point.
Node Movement I
We have to go through 3 types of node movement. The first is simply having Pacman jump from one to the other with no transition. If node A has node B as its left neighbor, and the player presses the left key, Pacman will jump from A to B.
We have to pass in the list of nodes that make up the maze. Pacman needs his starting node to be defined. So we’ll just set his position to the first node for now.
So in the pacman.py file, we add ‘node’ as a second argument of the ‘init’ class. We add 2 more ‘self’ lines after color. ‘self.node’ set to ‘node’ initializes Pacman’s position to the node. ‘setPosition()’ does the actual tying to it.
Delete the ‘self.position’ line from the ‘init’ and ‘update’ methods.
Then we add a separate ‘setPosition’ method just before the ‘update’ method, which copies the node’s position to Pacman’s. The ‘copy’ method is used to set an independent copy of the node’s position. Without this, modifying ‘setPosition’ would modify Pacman’s position.
def __init__(self, node): self.name = PACMAN self.directions = {STOP:Vector2(), UP:Vector2(0,-1), DOWN:Vector2(0,1), LEFT:Vector2(-1,0), RIGHT:Vector2(1,0)} self.direction = STOP self.speed = 100 self.radius = 10 self.color = YELLOW self.node = node self.setPosition()def setPosition(self): self.position = self.node.position.copy()
We add 2 more lines to the ‘update’ method.
The other two new methods, ‘validDirection’ and ‘getNewTarget’, check whether the key we’re pressing is a valid direction and whether there is a node in that direction. If so, then we move Pacman to that node automatically.
def update(self, dt): self.position += self.directions[self.direction]*self.speed*dt direction = self.getValidKey() self.direction = direction self.node = self.getNewTarget(direction) self.setPosition() def validDirection(self, direction): if direction is not STOP: if self.node.neighbors[direction] is not None: return True return Falsedef getNewTarget(self, direction): if self.validDirection(direction): return self.node.neighbors[direction] return self.node
Next in the run.py file, we modify the ‘startGame’ method so that we pass in the node we want Pacman to start on.
def startGame(self): self.setBackground() self.nodes = NodeGroup() self.nodes.setupTestNodes() self.pacman = Pacman(self.nodes.nodeList[0])
At this point, Pacman is now jumping from node to node only using the path to transition. He does not stay between nodes.
Part 2
So far we got Pacman jumping from node to node, but we want to see him moving between the nodes. In this part, he’ll be stopping on each node, even if a key is pressed. While Pacman is between nodes, any other key presses won’t be responsive. We also have to add a STOP condition when he starts to overshoot a node.
We’re adding a new ‘overshotTarget’ method in the pacman.py file that checks if he overshot a node. The ‘if’ loop is the lines that does this with ‘selfTarget’. If it is None, that means there is no target position to compare it with, indicating no overshot, to which it defaults to return False. If ‘selfTarget’ is not None, that means Pacman has overshot his target node. When this happens, the 2 vectors variables are calculated. ‘vec1’ finds the difference from the target position to the current node. ‘vec2’ finds the difference from Pacman’s position (self.position) to the current node. The ‘magnitudeSquared’ method is used to avoid a square root since we’re just comparing 2 distances; it simplifies the numbers.
If Pacman’s distance is greater than or equal to the distance between the 2 nodes, then he has officially overshot the target node.
def overshotTarget(self): if self.target is not None: vec1 = self.target.position - self.node.position vec2 = self.position - self.node.position node2Target = vec1.magnitudeSquared() node2Self = vec2.magnitudeSquared() return node2Self >= node2Target return False
Next we’re adding another variable to the ‘init’ method. ‘Self.target’ which is set to ‘node’. The target node is usually the node Pacman needs to move towards, but if Pacman is stationary on a node then the target node is simply None since he has no target.
def __init__(self, node):... self.setPosition() self.target = node
In the ‘update’ method, we delete everything below the ‘direction’ variable and replace it with:
def update(self, dt):... if self.overshotTarget(): self.node = self.target self.target = self.getNewTarget(direction) if self.target is not self.node: self.direction = direction else: self.direction = STOP self.setPosition()
At this point, Pacman now moves smoothly along the path between nodes. No more ‘jumping’
Part 3
Though we’ve seen Pacman move smoothly between nodes, he stops on each node. We also can’t change his direction when he’s traveling between nodes. In this section, we’ll change his movement so that he’ll only stop on a node if he can’t continue on to another node in the direction he is moving. Otherwise he’ll move past the node. We’ll also make it so he can reverse direction. By the end of this section, Pacman’s movement will be completed. It will function the same regardless of what maze you put him in.
We’re gonna create 2 new methods for the Pacman class. The first is ‘reverseDirection’. Whatever direction he’s already moving in, if I press a key of a different direction, it’ll multiply that value by -1, which makes it opposite. If LEFT is 2, pressing RIGHT makes that -2. The same goes for UP being 1 and pressing DOWN makes that -1. This is what the first ‘self.direction’ line does. The ‘temp’ variable temporarily stores ‘self.node’ so its value can be swapped with ‘self.target’s in the next line. Then in the line after that, ‘self.target’ takes the value of ‘temp’ which solidifies the swap.
But once we move Pacman in the opposite direction, we still have to swap the node and target, which leads to our second method.
‘oppositeDirection’ checks if the input direction is the opposite of Pacman’s current direction. The reason I want to check for this is because when Pacman is moving between nodes, the only direction he can move in is his current direction and his opposite direction. If he’s going left, he can either keep going that way, or go right. He shouldn’t be able to move up or down while he’s on that path. So I want to make sure that the input is a valid direction before saying he can move in that direction.
The ‘if’ loop states if the ‘direction’ argument is not ‘STOP’ it checks the condition that ‘direction’ is equal to the opposite of the current direction. So if the current direction (self.direction) is 2, and the ‘direction’ argument is -2, then they’re equal in that case thus it’ll return True.
def reverseDirection(self): self.direction *= -1 temp = self.node self.node = self.target self.target = tempdef oppositeDirection(self, direction): if direction is not STOP: if direction == self.direction * -1: return True return False
Lastly for this section we’re modifying the ‘update’ method. If the input direction does not get us a new valid target, then we check the current direction Pacman is moving in.
Remove the 2 lines under the ‘else’ and replace it with a ‘self.target’ variable set to the ‘getNewTarget’ object and including the direction. The new ‘if’ statement ensures that Pacman will stop when he hits a wall. Since he continuously moves forward, his target node can only be the same as his current one if he can’t move any more forward; which means he hit a wall. The last ‘else’ statement operates his reverse direction.
def update(self, dt): self.position += self.directions[self.direction]*self.speed*dt direction = self.getValidKey() if self.overshotTarget(): self.node = self.target self.target = self.getNewTarget(direction) if self.target is not self.node: self.direction = direction else: self.target = self.getNewTarget(self.direction) if self.target is self.node: self.direction = STOP self.setPosition() else: if self.oppositeDirection(direction): self.reverseDirection()
At this point, Pacman can now reverse direction while he’s traveling between nodes.
Maze Basics
Life is short. We don’t have time to create the maze node by node. So we’re gonna generate it automatically. To do this, we’ll create a text file, use that file as an input for some method, and then have that method output the required ‘nodeList’. To keep the file simple, we’ll create a small system of symbols to illustrate nodes and empty spaces for the computer to read.
- “X”: empty space
- “+”: node
- “.”: vertical/horizontal path (connectors)
We’re gonna use the map and add it into the text file. Again, make sure it’s a TEXT file (.txt) and not a Python one.
X X X X X X X XX + . . + X X XX . X X . X X XX + . . + . + XX . X X X X . XX . X X X X . XX + . . . . + XX X X X X X X X
In the node.py file, we’re first gonna import NumPy.
Add ‘level’ as an argument to the ‘init’ method of ‘NodeGroup’. We’re also gonna delete the ‘setupTestNode’ method. Now on to the additions to the ‘init’ method.
Delete ‘setupTestNodes’ and the ‘self.nodeList’ from ‘init’.
Since we imported Numpy, this will read out the text file and put it into an array, which we then transpose. We want the text file to be read in when we create an object from this class.
We take the ‘level’ argument and assign it to ‘self.level’ to create its own instance. ‘self.nodeLUT’ creates an empty dictionary for the lookup table. The 2 ‘symbol’ lines set the symbols, as you’d expect. We’re also storing our symbols in a list since we’ll need other symbols for other nodes and paths. The ‘data’ variable is set to read the maze file, as the method is named. It also calls ‘level’ as an argument or else it wouldn’t connect. The last 3 lines with the ‘data’ argument (that we literally just made) are the remaining steps for generating the maze.
import pygamefrom vector import Vector2from constants import *import numpy as npclass NodeGroup(object): def __init__(self, level): self.level = level self.nodesLUT = {} self.nodeSymbols = ['+'] self.pathSymbols = ['.'] data = self.readMazeFile(level) self.createNodeTable(data) self.connectHorizontally(data) self.connectVertically(data)
This next method is the text file using NumPy’s ‘loadtxt’ function, hence the ‘np’. The dtype needs to be set to ‘<U1’ or else it will try to read in the data as floats and create an error when it encounters non-float characters like the ‘.’ character. This will return a 2D NumPy array.
def readMazeFile(self, textfile): return np.loadtxt(textfile, dtype='<U1')
Now we’re creating the node table as a NumPy 2D array data structure. We’ll go through it row by row, and whenever we find a ‘+’, we’ll create an entry in the lookup table with the row and column the node was found in and create a Node object. The ‘data’ argument represents the array. It’s not built-in but ‘data’ is the common name we give to structures like that. The ‘offsets’ are meant to adjust the position of the coordinates by spacing them from the margin, but since they’re set to 0, they’re moot.
We start with a ‘for’ loop that iterates over the rows in the maze array. The ‘.shape’ method after ‘data’ is a NumPy attribute that collects the dimensions of an array. The [0] after that targets the rows of the array. [1] would be the columns. The ‘data.shape’ is within a ‘range’ function which will tell us how many rows there are. The ‘list’ function converts the range to a list.
We make these 2 loops for the rows and columns. The ‘if’ statement after that checks that the values of the (row, col) position are present in the ‘self.nodeSymbols’ list; it’s looking for a node. If the values are there, it calls the ‘constructKey’ method that converts a row and column in a text file to actual pixel values on the screen by multiplying them by whatever values we set for the tile sizes.
So the dictionary keys will be a (x,y) tuple, then the values will be a Node object. We’ll pass in the (x,y) location to that Node object as well. The dictionary makes it easier to lookup a node with its (x, y) position. If we only had a list of the node objects, we’d have to loop through them just to find a specific node.
def createNodeTable(self, data, xoffset=0, yoffset=0): for row in list(range(data.shape[0])): for col in list(range(data.shape[1])): if data[row][col] in self.nodeSymbols: x, y = self.constructKey(col+xoffset, row+yoffset) self.nodesLUT[(x, y)] = Node(x, y)def constructKey(self, x, y): return x * TILEWIDTH, y * TILEHEIGHT
Connecting Nodes Horizontally & Vertically
At this point we have a dictionary of Node objects, but none of the nodes are connected together. We’re gonna follow a 2-step process to connect them. Horizontally, then vertically.
When making the method, we use the same arguments we used in ‘createNodeTable’. Remember ‘data’ is the array of the maze symbols. The 2 ‘for’ loops do the same thing as they did in the last one: iterate through each row and column.
The ‘if’ statement checks if the current iterated position is in the ‘self.nodeSymbols’ set.
We scan each row for a ‘+’. When we find one, we check if the ‘key’ value is ‘None’ or not. We initially set it to ‘None’ when we start on a new row. The key can also contain a key to our dictionary. We call it ‘key’ so we know if 2 nodes need to be connected horizontally or not.
Again, when we come across a key, we look at the value of the key variable. If its value is ‘None’, we set it to the key of that node in the dictionary. This way we can see if it connects to another node down the line.
If we encounter a ‘+’ that is not None, but an actual value, then we connect those 2 nodes. Since we’re moving left to right, the new node we encountered is to the right of the previous node we encountered. And the previous node is to the left of the new node. Anytime we encounter any characters that are not in the ‘pathSymbols‘ list (which only contains ‘.’ for now), then set the key to ‘None‘ again.
def connectHorizontally(self, data, xoffset=0, yoffset=0): for row in list(range(data.shape[0])): key = None for col in list(range(data.shape[1])): if data[row][col] in self.nodeSymbols: if key is None: key = self.constructKey(col+xoffset, row+yoffset) else: otherkey = self.constructKey(col+xoffset, row+yoffset) self.nodesLUT[key].neighbors[RIGHT] = self.nodesLUT[otherkey] self.nodesLUT[otherkey].neighbors[LEFT] = self.nodesLUT[key] key = otherkey elif data[row][col] not in self.pathSymbols: key = None
To connect them vertically, we’re gonna transpose the array. Which means the columns become rows and the rows become columns. This way we can apply the same logic we just did to connecting the nodes vertically. The main difference here is when we connect the nodes we need to reference UP and DOWN instead of LEFT and RIGHT. If we have an array that has shape (m, n), then the shape of the transposed array is (n, m). Other than that, the code is pretty much the same.
The ‘dataT’ is the variable we’re setting for the transposed version of the array. After that, the process is the same as horizontal. Just apply ‘dataT’ where ‘data’ would be.
def connectVertically(self, data, xoffset=0, yoffset=0): dataT = data.transpose() for col in list(range(dataT.shape[0])): key = None for row in list(range(dataT.shape[1])): if dataT[col][row] in self.nodeSymbols: if key is None: key = self.constructKey(col+xoffset, row+yoffset) else: otherkey = self.constructKey(col+xoffset, row+yoffset) self.nodesLUT[key].neighbors[DOWN] = self.nodesLUT[otherkey] self.nodesLUT[otherkey].neighbors[UP] = self.nodesLUT[key] key = otherkey elif dataT[col][row] not in self.pathSymbols: key = None
We’re also adding 2 methods that allow us to access a node through its pixel location (x, y) or its tile location (row, column).
def getNodeFromPixels(self, xpixel, ypixel): if (xpixel, ypixel) in self.nodesLUT.keys(): return self.nodesLUT[(xpixel, ypixel)] return Nonedef getNodeFromTiles(self, col, row): x, y = self.constructKey(col, row) if (x, y) in self.nodesLUT.keys(): return self.nodesLUT[(x, y)] return None
Next we’ll add a temporary ‘start node’ method. For now it’ll be the first node in the lookup table. We’ll change it later.
def getStartTempNode(self): nodes = list(self.nodesLUT.values()) return nodes[0]
Next we have to change how to reference the nodes for drawing to the screen since we’re using the nodesLUT instead of the nodesList to keep track of our nodes.
Delete the ‘self.nodeList’ method and replace it with the LUT
def render(self, screen): for node in self.nodesLUT.values(): node.render(screen)
Lastly we have to modify the ‘startGame’ method in the GameController class by passing in the name of the text file when we create the NodeGroup object. This is done in the run.py file.
Add “mazetest.txt” as an argument to the first ‘self.nodes’ line. Delete the second ‘self.nodes’. In ‘self.pacman’, delete the ‘nodeList[0]’ method, and replace that with ‘getStartTempNode()’
Then for the Pacman object we’ll call the method we just created that will return the node Pacman should start on.
def startGame(self): self.setBackground() self.nodes = NodeGroup("mazetest.txt") self.pacman = Pacman(self.nodes.getStartTempNode())
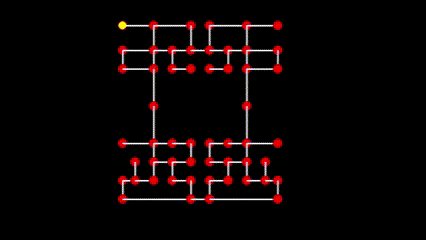
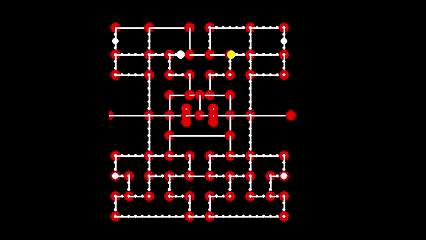
Maze 1
We’re gonna scrap that test maze and add in a real one that we can play on. It won’t have graphics but the layout will be there. Name it ‘maze1.txt‘
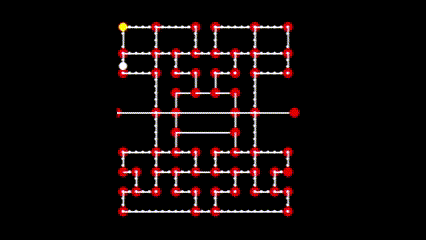
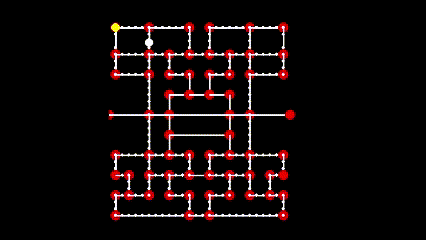
X X X X X X X X X X X X X X X X X X X X X X X X X X X XX X X X X X X X X X X X X X X X X X X X X X X X X X X XX X X X X X X X X X X X X X X X X X X X X X X X X X X XX X X X X X X X X X X X X X X X X X X X X X X X X X X XX + . . . . + . . . . . + X X + . . . . . + . . . . + XX . X X X X . X X X X X . X X . X X X X X . X X X X . XX . X X X X . X X X X X . X X . X X X X X . X X X X . XX . X X X X . X X X X X . X X . X X X X X . X X X X . XX + . . . . + . . + . . + . . + . . + . . + . . . . + XX . X X X X . X X . X X X X X X X X . X X . X X X X . XX . X X X X . X X . X X X X X X X X . X X . X X X X . XX + . . . . + X X + . . + X X + . . + X X + . . . . + XX X X X X X . X X X X X . X X . X X X X X . X X X X X XX X X X X X . X X X X X . X X . X X X X X . X X X X X XX X X X X X . X X + . . + . . + . . + X X . X X X X X XX X X X X X . X X . X X X = = X X X . X X . X X X X X XX X X X X X . X X . X X X X X X X X . X X . X X X X X X+ . . . . . + . . + X X X X X X X X + . . + . . . . . +X X X X X X . X X . X X X X X X X X . X X . X X X X X XX X X X X X . X X . X X X X X X X X . X X . X X X X X XX X X X X X . X X + . . . . . . . . + X X . X X X X X XX X X X X X . X X . X X X X X X X X . X X . X X X X X XX X X X X X . X X . X X X X X X X X . X X . X X X X X XX + . . . . + . . + . . + X X + . . + . . + . . . . + XX . X X X X . X X X X X . X X . X X X X X . X X X X . XX . X X X X . X X X X X . X X . X X X X X . X X X X . XX + . + X X + . . + . . + . . + . . + . . + X X + . + XX X X . X X . X X . X X X X X X X X . X X . X X . X X XX X X . X X . X X . X X X X X X X X . X X . X X . X X XX + . + . . + X X + . . + X X + . . + X X + . . + . + XX . X X X X X X X X X X . X X . X X X X X X X X X X . XX . X X X X X X X X X X . X X . X X X X X X X X X X . XX + . . . . . . . . . . + . . + . . . . . . . . . . + XX X X X X X X X X X X X X X X X X X X X X X X X X X X XX X X X X X X X X X X X X X X X X X X X X X X X X X X XX X X X X X X X X X X X X X X X X X X X X X X X X X X X
Go back to the ‘GameController’ class in the run.py file and change the maze file name in ‘self.nodes’.
def startGame(self): self.setBackground() self.nodes = NodeGroup("maze1.txt") self.pacman = Pacman(self.nodes.getStartTempNode())
At this point, Pacman has a full maze he can move through. The portals don’t yet go anywhere, so he just stops.
Portals
A signature feature of Pacman is the portals that take you from one side of the maze to the other.
To make this, we’re gonna add a new neighbor type next to our regular directional ones. This neighbor will let us jump (or portal) to it. Add ‘PORTAL’ after ‘RIGHT’ and set it to ‘None’ like the others.
class Node(object): def __init__(self, x, y): self.position = Vector2D(x, y) self.neighbors = {UP:None, DOWN:None, LEFT:None, RIGHT:None, PORTAL:None}
We’ll also add PORTAL to the ‘constants.py‘ file. Its value is irrelevant, so we’ll just put 3.
PORTAL = 3
Obviously, the portals have to be in pairs. Otherwise where would Pacman go? So we’re gonna create a new method in the ‘NodeGroup’ class that takes 2 tuple values that’ll check if they’re in the nodes’ LUT or not.
The 2 ‘key’ variables create a key for their respective pairs. The asterisk (*) in front of the ‘pair’ argument unpacks all the elements of ‘pair’s arguments, which is x and y. The ‘if’ statement after the keys checks if they’re present in the LUT. If they’re not, we move on. If they are, we connect them with the PORTAL key which is what the last 2 lines take care of.
def setupPortalPair(self, pair1, pair2): key1 = self.constructKey(*pair1) key2 = self.constructKey(*pair2) if key1 in self.nodesLUT.keys() and key2 in self.nodesLUT.keys(): self.nodesLUT[key1].neighbors[PORTAL] = self.nodesLUT[key2] self.nodesLUT[key2].neighbors[PORTAL] = self.nodesLUT[key1]
In the GameController class in run.py we have to call this new method after creating the node object. 2 tuples of 2 nodes to be connected are passed in. There’s no particular reason we chose these values, we just need something in there for now.
def startGame(self): self.setBackground() self.nodes = NodeGroup("maze1.txt") self.nodes.setPortalPair((0,17), (27,17)) self.pacman = Pacman(self.nodes.getStartTempNode())
Now we have to tell Pacman to jump from one node to another when going through a portal. When Pacman overshoots a node we set that node as his current node and then find the next target node. Before we try to find the next target node, we check to see if this new node is a portal node or not. If not, then we move on like normal. If it is, then we set that node’s portal node as the new node instead. In the ‘update’ method of pacman.py
def update(self, dt): self.position += self.directions[self.direction]*self.speed*dt direction = self.getValidKey() if self.overshotTarget(): self.node = self.target if self.node.neighbors[PORTAL] is not None: self.node = self.node.neighbors[PORTAL] self.target = self.getNewTarget(direction) if self.target is not self.node: self.direction = direction else: self.target = self.getNewTarget(self.direction) if self.target is self.node: self.direction = STOP self.setPosition() else: if self.oppositeDirection(direction): self.reverseDirection()
Pacman can now go through a portal and come out the other with no issue

Pellets
In the original Pacman, there were 240 regular pellets plus 4 power pellets in each level. Regular is worth 10 points and power is worth 50, giving you 2600 points minimum for eating all the pellets in the level.
We’ll be following this based on our maze symbols:
- Anywhere there’s a ‘.’ or a ‘+’, place a pellet.
- Anywhere there’s a ‘p’, place a power pellet
- Anywhere there’s a ‘P’, place a power pellet
‘p’ is for a path and ‘P’ is for a node. We’ll also need symbols for areas with no pellets
- Anywhere there’s a ‘+’, ‘P’, ‘n’, place a node
- Anywhere there’s a ‘.’, ‘-‘, ‘|’, ‘p’, place a path
We’ll modify our maze.txt file and place pellets into it:
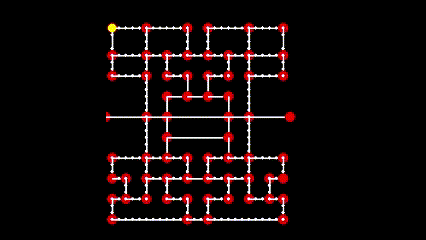
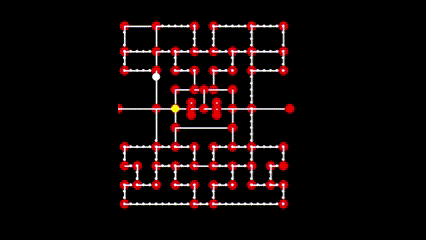
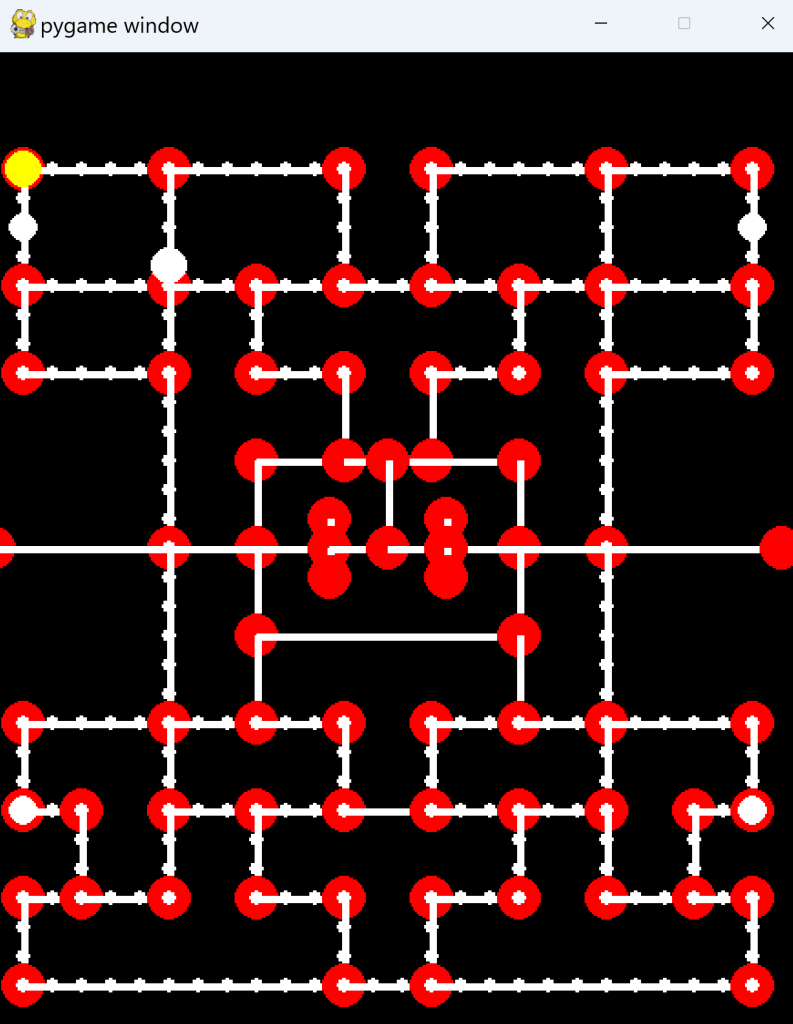
X X X X X X X X X X X X X X X X X X X X X X X X X X X XX X X X X X X X X X X X X X X X X X X X X X X X X X X XX X X X X X X X X X X X X X X X X X X X X X X X X X X XX X X X X X X X X X X X X X X X X X X X X X X X X X X XX + . . . . + . . . . . + X X + . . . . . + . . . . + XX . X X X X . X X X X X . X X . X X X X X . X X X X . XX p X X X X . X X X X X . X X . X X X X X . X X X X p XX . X X X X . X X X X X . X X . X X X X X . X X X X . XX + . . . . + . . + . . + . . + . . + . . + . . . . + XX . X X X X . X X . X X X X X X X X . X X . X X X X . XX . X X X X . X X . X X X X X X X X . X X . X X X X . XX + . . . . + X X + . . + X X + . . + X X + . . . . + XX X X X X X . X X X X X | X X | X X X X X . X X X X X XX X X X X X . X X X X X | X X | X X X X X . X X X X X XX X X X X X . X X n - - n - - n - - n X X . X X X X X XX X X X X X . X X | X X X = = X X X | X X . X X X X X XX X X X X X . X X | X X X X X X X X | X X . X X X X X Xn - - - - - + - - n X X X X X X X X n - - + - - - - - nX X X X X X . X X | X X X X X X X X | X X . X X X X X XX X X X X X . X X | X X X X X X X X | X X . X X X X X XX X X X X X . X X n - - - - - - - - n X X . X X X X X XX X X X X X . X X | X X X X X X X X | X X . X X X X X XX X X X X X . X X | X X X X X X X X | X X . X X X X X XX + . . . . + . . + . . + X X + . . + . . + . . . . + XX . X X X X . X X X X X . X X . X X X X X . X X X X . XX . X X X X . X X X X X . X X . X X X X X . X X X X . XX P . + X X + . . + . . + . . + . . + . . + X X + . P XX X X . X X . X X . X X X X X X X X . X X . X X . X X XX X X . X X . X X . X X X X X X X X . X X . X X . X X XX + . + . . + X X + . . + X X + . . + X X + . . + . + XX . X X X X X X X X X X . X X . X X X X X X X X X X . XX . X X X X X X X X X X . X X . X X X X X X X X X X . XX + . . . . . . . . . . + . . + . . . . . . . . . . + XX X X X X X X X X X X X X X X X X X X X X X X X X X X XX X X X X X X X X X X X X X X X X X X X X X X X X X X XX X X X X X X X X X X X X X X X X X X X X X X X X X X X
Now we’re gonna create a class to deal with these pellets in a new file: pellets.py.
First, we’ll add these 2 constants in our constants.py file
PACMAN = 0PELLET = 1POWERPELLET = 2
Then add this to the new pellets.py file.
import pygamefrom vector import Vector2from constants import *import numpy as npclass Pellet(object): def __init__(self, row, column): self.name = PELLET self.position = Vector2(column*TILEWIDTH, row*TILEHEIGHT) self.color = WHITE self.radius = int(4 * TILEWIDTH / 16) self.collideRadius = int(4 * TILEWIDTH / 16) self.points = 10 self.visible = True def render(self, screen): if self.visible: p = self.position.asInt() pygame.draw.circle(screen, self.color, p, self.radius)
‘Self.position’ calculates a pellet’s position with the Vector2 object by multiplying its ‘row’ and ‘column’ parameters by their opposite tiles. A pellet is just a white circle that has a radius of 4 pixels. The ‘radius’ and the ‘collideRadius’ variables are multiplied by 4 then divided by 16 for the purpose of scaling the game based on the size of the display it’s being played on. It ensures that pellets are always a 16th of the tile. We also specify how many points a pellet is worth: 10 points. The ‘visible’ variable just allows us to hide a pellet if we want.
The ‘p’ variable in the ‘render’ method turns the pellet’s position to an integer.
The PowerPellet class defines the larger pellet that gives Pacman the special power to eat the ghosts. For now, the only difference is that it’s larger, it’s worth more points than the regular pellet, and it has a timer
The ‘flashTime’ variable makes the power pellet continually appear and disappear (hence ‘flash’) for a .2-second period. In the ‘update’ method, we first set the timer to ‘dt’ to keep track of the game time along with the power pellet’s flash time. The rest of the lines basically model the cycle of the flash.
class PowerPellet(Pellet): def __init__(self, row, column): Pellet.__init__(self, row, column) self.name = POWERPELLET self.radius = int(8 * TILEWIDTH / 16) self.points = 50 self.flashTime = 0.2 self.timer = 0 def update(self, dt): self.timer += dt if self.timer >= self.flashTime: self.visible = not self.visible self.timer = 0
There’s gonna be a lot of pellets on the screen, so we should keep them organized. We won’t have to call our ‘Pellet’ and ‘PowerPellet’ classes directly, they’ll be called through this class; similar to the NodeGroup that groups all the pellets into one list.
To create a pellet, we’ll read the file line by line and create a pellet at that position based on the symbol we defined earlier. Then when we want to draw them, we just call this ‘render’ method and it will take care of drawing the pellets for us.
The ‘pelletList’ just stores all of the pellets including the power pellets, and the ‘powerpellets’ list just stores the Power Pellets. The powers have their own list so we can directly access them when creating the function to make them flash.
We’re also adding an ‘isEmpty’ method that checks for when the pelletList is empty, meaning the level has been cleared. pellets.py
class PelletGroup(object): def __init__(self, pelletfile): self.pelletList = [] self.powerpellets = [] self.createPelletList(pelletfile) self.numEaten = 0 def update(self, dt): for powerpellet in self.powerpellets: powerpellet.update(dt) def createPelletList(self, pelletfile): data = self.readPelletfile(pelletfile) for row in range(data.shape[0]): for col in range(data.shape[1]): if data[row][col] in ['.', '+']: self.pelletList.append(Pellet(row, col)) elif data[row][col] in ['P', 'p']: pp = PowerPellet(row, col) self.pelletList.append(pp) self.powerpellets.append(pp) def readPelletfile(self, textfile): return np.loadtxt(textfile, dtype='<U1') def isEmpty(self): if len(self.pelletList) == 0: return True return False def render(self, screen): for pellet in self.pelletList: pellet.render(screen)
Next we’re gonna add some node and path symbols to reflect our new maze.txt file. We’re adding ‘P’ and ‘n’ to the node, and ‘-‘, ‘/’, and ‘p’ to the path. nodes.py
class NodeGroup(object): def __init__(self, level): self.level = level self.nodesLUT = {} self.nodeSymbols = ['+', 'P', 'n'] self.pathSymbols = ['.', '-', '|', 'p']
Now for some GameController changes. In the run.py file, we’ll import the PelletGroup class we just made.
In the ‘startGame’ method we’ll create a PelletGroup object and pass in the maze1.txt file so that it will know where to create the pellets.
In the ‘render’ method we’ll draw the pellets. Draw them before drawing Pacman so that the pellets appear below Pacman.
import pygame...from pellets import PelletGroupdef startGame(self):... self.pellets = PelletGroup("maze1.txt")def update(self):... self.pellets.update(dt)def render(self):... self.pellets.render(self.screen)
Eating Pellets
Now that we’ve got the pellets to show, we gotta make Pacman eat them. ‘Eating’ in the technical sense means he’s colliding with the pellets. To manage this, we’ll be using a circle-to-circle collision check. Let’s say we have circles A and B. They both have their own radius, RA and RB. We also have another variable, D, the actual distance between the circles. If D is greater than the sum of the radii, then the circles can’t be colliding. If D is less than or equal to the sum, then they are colliding.
In the ‘init’ method of pacman.py, we’re going to add a variable to define Pacman’s collision radius. We could set this radius to be the same as Pacman’s but we’re gonna shrink it a bit so it looks like the pellets are being ingested and not just disappearing as soon as he touches it.
class Pacman(object): def __init__(self, node): ... self.collideRadius = 5
We’re also gonna create a new method that takes the pellet list and loops through each pellet until we find one that Pacman is colliding with. If we find the pellet he’s colliding with, we return it. If not, we return None.
Notice that we are comparing the square of the distances rather than the actual distances. This is to avoid taking the square root which is an expensive operation. Comparing the square of the distances is just as valid and faster.
def eatPellets(self, pelletList): for pellet in pelletList: d = self.position - pellet.position dSquared = d.magnitudeSquared() rSquared = (pellet.radius+self.collideRadius)**2 if dSquared <= rSquared: return pellet return None
Next we’re creating a method that handles all of the pellet events. We’re sending the ‘pelletList’ to Pacman and returns the pellet (if any) that he’s colliding with. If the pellet variable is anything other than None, then we just remove that pellet from the list. This goes in the GameController class of run.py
def checkPelletEvents(self): pellet = self.pacman.eatPellets(self.pellets.pelletList) if pellet: self.pellets.numEaten += 1 self.pellets.pelletList.remove(pellet)
We then call it in the ‘update’ method to bring it to life
def update(self):... self.pellets.update(dt) self.checkPelletEvents() self.checkEvents()...
At this point, the pellets are in the maze and Pacman eats them. Nothing happens when a power pellet is eaten besides it disappearing.
Ghosts Intro
As we know, there are 4 unique ghosts in Pacman. Let’s look at their movement first.
They move node to node the same way Pacman does. We have to establish some principles for their movement.
- When traveling from one node to another, they can’t reverse direction (except in a few special cases)
- When a ghost gets to a node, it can move in any direction except the one it just came from. If it moved left to get to a node, it can’t then go right
- A ghost can only backtrack if it reaches a dead end.
- Ghosts move entirely on their own. The player has 0 control.
- The ghosts choose a direction when entering a node based on which direction will get them closer to the goal they are trying to reach.
We’re gonna create a new entity.py file. Since Pacman and the ghosts move similarly, we can use this generic class to set those terms along with some more specific ones. Any object that inherits from this class will be able to move around on its own. Note the ‘visible’ variable that allows any object to be made invisible.
Most of the ‘init’ method speaks for itself. The ‘setSpeed’ method may look weird and you may be asking why are we setting the speed based on the TILEWIDTH? Well, if you have a set speed like 100, that works well for a map that has 16×16 tiles. If you make the maze bigger with 32×32 tiles, for example, then Pacman will actually appear to move slower. He’s still moving at the same speed, but he has more ground to cover on a larger maze. If you make the maze with 8×8 tiles, then he’ll appear to move twice as fast. So we need to adjust his speed depending on the size of the maze so we can get a similar experience no matter how large the maze is.
The ‘setPosition’ just matches the entity’s position to the current node’s. Just how we defined those principles for the ghosts’ movement, ‘validDirection’ checks if the direction is valid for an entity to move in; returning ‘True’ if it is and leads to a neighboring node, otherwise returning ‘False’. This leads to the ‘getNewTarget’ method since the entity needs a new target node once it’s given a new direction. ‘overshotTarget’ checks for what it is. It only has those extra lines since it’s calculating the squared distance. For the ‘reverse’ and ‘oppositeDirection’ methods, the former actually changes the entity’s movement, the latter is more for A.I. purposes where it’s just checking the opposite direction in case it may be better for its goal. We just went over ‘setSpeed’. And ‘render’, as always, does the drawing.
import pygamefrom pygame.locals import *from vector import Vector2from constants import *from random import randintclass Entity(object): def __init__(self, node): self.name = None self.directions = {UP:Vector2(0, -1),DOWN:Vector2(0, 1), LEFT:Vector2(-1, 0), RIGHT:Vector2(1, 0), STOP:Vector2()} self.direction = STOP self.setSpeed(100) self.radius = 10 self.collideRadius = 5 self.color = WHITE self.node = node self.setPosition() self.target = node self.visible = True self.disablePortal = False def setPosition(self): self.position = self.node.position.copy() def validDirection(self, direction): if direction is not STOP: if self.node.neighbors[direction] is not None: return True return False def getNewTarget(self, direction): if self.validDirection(direction): return self.node.neighbors[direction] return self.node def overshotTarget(self): if self.target is not None: vec1 = self.target.position - self.node.position vec2 = self.position - self.node.position node2Target = vec1.magnitudeSquared() node2Self = vec2.magnitudeSquared() return node2Self >= node2Target return False def reverseDirection(self): self.direction *= -1 temp = self.node self.node = self.target self.target = temp def oppositeDirection(self, direction): if direction is not STOP: if direction == self.direction * -1: return True return False def setSpeed(self, speed): self.speed = speed * TILEWIDTH / 16 def render(self, screen): if self.visible: p = self.position.asInt() pygame.draw.circle(screen, self.color, p, self.radius)
After that we’re gonna add an ‘update’ method to this class. It’s mostly similar to Pacman’s, except that we’re not choosing the ghosts’ direction. Instead, we’ll make them choose a random next direction when they get to a node.
Like any ‘update’ method, this updates the object’s state as time goes on; hence the ‘dt’ argument to represent time. The ‘self.position’ below that makes the entity move at a constant speed over time. The big ‘if’ statement checks if the entity overshot its target. If it did, per the next 3 lines, its current node is set to be the target, it retrieves the list of valid directions, then it calls to select a random direction.
The ‘if not’ statement deals with portals. Checking if they’re enabled and if the current node has a neighbor connected through a portal. If both conditions are met, the entity’s current node is updated to the neighboring node connected through the portal.
‘getNewTarget’ does what it says. The last ‘if’ statement updates the entity’s direction once the new target is chosen. Assuming the target is different from the current node. Otherwise, if the target is the same as the current, ‘self.direction’ is restricted from changing. Then finally, the entity’s position is updated to the new current node.
def update(self, dt): self.position += self.directions[self.direction]*self.speed*dt if self.overshotTarget(): self.node = self.target directions = self.validDirections() direction = self.randomDirection(directions) if not self.disablePortal: if self.node.neighbors[PORTAL] is not None: self.node = self.node.neighbors[PORTAL] self.target = self.getNewTarget(direction) if self.target is not self.node: self.direction = direction else: self.target = self.getNewTarget(self.direction) self.setPosition()
The ‘validDirections’ method is different from ‘validDirection’ in pacman.py. The former contains a list of valid directions the entity can move in. We use the ‘directions’ variable to initialize an empty list. We’ll loop through all 4 directions and see if the node connects to another node in that direction. If it does, then we make sure it’s not the node we’re coming from. If the list is still empty after those loops, then we stick with the direction from which we came. We add that as the only valid direction.
The second method just chooses one of the directions randomly using the ‘randint’ method we imported.
def validDirections(self): directions = [] for key in [UP, DOWN, LEFT, RIGHT]: if self.validDirection(key): if key != self.direction * -1: directions.append(key) if len(directions) == 0: directions.append(self.direction * -1) return directionsdef randomDirection(self, directions): return directions[randint(0, len(directions)-1)]
Now we gotta add Pacman in as an entity too. This is done in pacman.py
We first import ‘entity’. We change the Pacman class’s inheritance to ‘Entity’. Since we added those generic characteristics in the entity.py file, we can delete them from Pacman so he only has those specific to him. So we’ll delete the methods ‘setPosition’, ‘overshotTarget’, ‘valid/reverse/oppositeDirection’, and the ‘render’ method. Again, these are already in entity.py so it’s redundant to have them in pacman.py too. Also add an ‘Entity.__init__’ line right under Pacman’s ‘init’ method.
import pygame...from entity import Entityclass Pacman(Entity): def __init__(self, node): Entity.__init__(self, node) self.name = PACMAN ...
Nothing should be different about the game at this point. If it is, you did something wrong
Ghost Setup
Now we’re gonna create a new file ghosts.py. And we’re gonna add a ‘ghosts’ constant with a value of 3.
GHOST = 3
Create a ‘Ghost’ class with an inheritance from ‘Entity’. Start the ‘init’ method with an ‘entity init’, setting ‘self’ and ‘node’ as both of their arguments. Write the name and set the points to 200.
import pygamefrom pygame.locals import *from vector import Vector2from constants import *from entity import Entityclass Ghost(Entity): def __init__(self, node): Entity.__init__(self, node) self.name = GHOST self.points = 200
We’ll also make our additions in the run.py file. We do the import, and add to the ‘startGame’, ‘update’, and ‘render’ methods.
import pygame...from ghosts import Ghostdef startGame(self):... self.ghost = Ghost(self.nodes.getStartTempNode())def update(self):... self.pacman.update(dt) self.ghost.update(dt)def render(self):... self.ghost.render(self.screen) pygame.display.update()
At this point, there is one ghost moving randomly around the maze. Nothing happens if Pacman collides with it
Ghost AI Start
At this point the ghosts are moving randomly around the maze. To make the game a challenge we can give them some intelligence, or at least the appearance of such. We can do this by simply giving them a goal to reach (a vector), and they never have to reach it.
We add a goal vector in the entity.py and the ghosts.py files. Entity’s is set to ‘None’ since that would give all entities the same goal. We just want to work with the ghosts, so we set that in the ghost’s file to specify it.
class Entity(object): def __init__(self, node): ... self.goal = None---SEPARATE FILE---class Ghost(Entity): def __init__(self, node): ... self.goal = Vector2()
This next method will take a list of directions, we’ll assume they are already valid directions, and for each of the directions in the list it will calculate the distance from the entity to the goal. It then returns the direction with the smallest distance; specifically the line of sight distance.
What you should see after you implement these changes is that the ghost will be moving around in a circle in the upper left corner. This is because the ghost is basically trying to reach the screen’s origin which is the upper left corner of the screen, but can’t because of the movement restrictions we’ve placed on it. Remember that it can’t ever STOP during the game, so it has to choose a target every time it reaches a node, even if that target takes it further from the goal. But if it is able to choose a target that takes it closer to the goal, it will. In entity.py
def goalDirection(self, directions): distances = [] for direction in directions: vec = self.node.position + self.directions[direction]*TILEWIDTH - self.goal distances.append(vec.magnitudeSquared()) index = distances.index(min(distances)) return directions[index]
So for an entity that needs to reach its goal, it’ll call this ‘self.directionMethod’ instead of the ‘randomDirection’ method. It’ll be a variable that replaces it. Also, delete the ‘direction’ variable and replace ‘randomDirection’ with ‘directionMethod’
class Entity(object): def __init__(self, node): ... self.directionMethod = self.randomDirectiondef update(self, dt): self.position += self.directions[self.direction]*self.speed*dt if self.overshotTarget(): self.node = self.target directions = self.validDirections() direction = self.directionMethod(directions) if not self.disablePortal: if self.node.neighbors[PORTAL] is not None: self.node = self.node.neighbors[PORTAL] self.target = self.getNewTarget(direction) if self.target is not self.node: self.direction = direction else: self.target = self.getNewTarget(self.direction) self.setPosition()
After establishing that, we just tell the ghost to use the new method instead of ‘randomDirections’ in ghosts.py
class Ghost(Entity): def __init__(self, node):... self.directionMethod = self.goalDirection
The ghost should circle the top left corner at this point.
Modes Overview
Technically, all the phases of the game are based around the ghosts’ behavior. For that, there are 4 modes:
- Chase – the default phase, a ghost is tracking down Pacman; his position is their goal. Different methods for all ghosts
- Freight – when Pacman eats a power pellet, the ghosts are vulnerable and move randomly and slowly. This lasts longer in earlier levels and shorter in the later ones.
- Scatter -a ghost scatters to the corner of the maze. Each ghost has his own corner
- Spawn – when Pacman eats the ghosts. Their goal is to get to their spawn location to respawn. They move very fast in this mode.
We can think of chase and scatter to be the main modes and the others to be transitional. All the ghosts should be synchronized to scatter and chase at the same time. There should be an object to continuously flip these back & forth independent of what the ghosts are doing. The ghosts can individually go into one of the interrupt modes, but once those are finished they can easily find out if they should be in SCATTER or CHASE by asking the main mode object.
We’ll add each of the 4 modes to the constants.py file, numbered 0 to 3 for their values.
SCATTER = 0CHASE = 1FREIGHT = 2SPAWN = 3
We’re creating another file called mode.py. Scatter mode has a timer set to it so that when it runs out, it switches to chase mode for however long we set it.
from constants import *class MainMode(object): def __init__(self): self.timer = 0 self.scatter() def update(self, dt): self.timer += dt if self.timer >= self.time: if self.mode is SCATTER: self.chase() elif self.mode is CHASE: self.scatter() def scatter(self): self.mode = SCATTER self.time = 7 self.timer = 0 def chase(self): self.mode = CHASE self.time = 20 self.timer = 0
In this file we’re going to create a class that controls the modes so that we can always know which mode the ghost has to be in. Right now it’s only passing along the main mode (scatter or chase).
We’ll also pass in the entity this mode controller is controlling in case it needs to send any messages back to the entity.
class ModeController(object): def __init__(self, entity): self.timer = 0 self.time = None self.mainmode = MainMode() self.current = self.mainmode.mode self.entity = entity def update(self, dt): self.mainmode.update(dt) self.current = self.mainmode.mode
Now we gotta make the ghosts aware of this mode class. As far as they’re concerned, the only difference between the modes is what their goal (target node) is. As of now, the one ghost’s only goal is scatter, which is defined to the upper-left corner. And since the goal in chase mode is Pacman’s position, we’ll have to make the ghost aware of that.
We first add the import in the ghosts.py file. Then update the ‘init’ method in the Ghost class. Along with the node the ghost should start on, we’ll pass in the Pacman and mode objects. We’ll also create scatter and chase methods so we can replace our goal with the output of the scatter method.
...from modes import ModeControllerclass Ghost(Entity): def __init__(self, node, pacman=None):... self.pacman = pacman self.mode = ModeController(self)
We see the scatter and chase methods simply define the ghosts’ goal. Scatter’s is the top-left corner and chase’s is Pacman’s position. In this update method, we’re asking it which mode it’s in. Then we call the parent’s update method at the end.
def update(self, dt): self.mode.update(dt) if self.mode.current is SCATTER: self.scatter() elif self.mode.current is CHASE: self.chase() Entity.update(self, dt) def scatter(self): self.goal = Vector2() def chase(self): self.goal = self.pacman.position
Then in the run.py file, we pass in the Pacman object to the ghost so he can keep track of where Pacman is.
def startGame(self): ... self.ghost = Ghost(self.nodes.getStartTempNode(), self.pacman)
At this point the ghost should start moving in the top-left corner as before, then eventually start chasing Pacman. Still nothing happens when they collide

Ghost Home
You know what this is. This is where the ghosts start and respawn. Pacman isn’t ever allowed to go in here. Once the game starts, the ghosts don’t come back here unless they’re eaten.
To make the nodes for this, we’re gonna create a new method ‘createHomeNodes’ which will need an x-offset and y-offset. We add this into nodes.py
class NodeGroup(object): def __init__(self, level): ... self.homekey = None
Since the home is so small, we can put the symbols directly in the code instead of a text file.
def createHomeNodes(self, xoffset, yoffset): homedata = np.array([['X','X','+','X','X'], ['X','X','.','X','X'], ['+','X','.','X','+'], ['+','.','+','.','+'], ['+','X','X','X','+']]) self.createNodeTable(homedata, xoffset, yoffset) self.connectHorizontally(homedata, xoffset, yoffset) self.connectVertically(homedata, xoffset, yoffset) self.homekey = self.constructKey(xoffset+2, yoffset) return self.homekey
The nodes of this box have to be other nodes, otherwise the ghosts can’t enter or exit. Pacman should never enter, but the ghosts will need to in spawn mode.
This method connects the topmost node to whatever other node we want. We also need to specify a direction. For example, let’s say there’s a node to the right of the home node that we want to connect to. I need to specify the key to that node and also the RIGHT direction. This will connect the two nodes together in both directions. So the home node will connect to the other node on the LEFT. This will overwrite what was previously in the other nodes’ LEFT value.
def connectHomeNodes(self, homekey, otherkey, direction): key = self.constructKey(*otherkey) self.nodesLUT[homekey].neighbors[direction] = self.nodesLUT[key] self.nodesLUT[key].neighbors[direction*-1] = self.nodesLUT[homekey]
In the ‘startGame’ method of the run.py file we’ll add 3 lines to code the home box into actual nodes. We call the ‘connectHomeNodes’ method twice so the home is connected to a node to its left and right.
def startGame(self): self.nodes.setPortalPair((0,17), (27,17)) homekey = self.nodes.createHomeNodes(11.5, 14) self.nodes.connectHomeNodes(homekey, (12,14), LEFT) self.nodes.connectHomeNodes(homekey, (15,14), RIGHT) self.pacman = Pacman(self.nodes.getStartTempNode())
At this point, the home box is now an open space that Pacman and the ghosts are able to come and go into. We’ll add the restrictions later
Freight Mode
This is the iconic mode that makes the game what it is. Pacman has to be able to eat the ghosts, and the ghosts have to be able to respawn.
The ghosts are currently either in chase or scatter mode. Freight mode can only happen 4 times in a level since there are only 4 power pellets. It only lasts for about 7 seconds, decreasing the time with each level. The ghosts also move 50% their speed in freight mode.
This section will only send the ghosts in freight mode. We’ll need another section to break down eating them.
We’re gonna modify the ‘checkPelletEvents’ method in run.py to ask if it was a power pellet that was eaten.
def checkPelletEvents(self): pellet = self.pacman.eatPellets(self.pellets.pelletList) if pellet: self.pellets.numEaten += 1 self.pellets.pelletList.remove(pellet) if pellet.name == POWERPELLET: self.ghost.startFreight()
Now we’re gonna set the method for freight mode in the ‘ModeController’ class in modes.py.
class ModeController(object): def setFreightMode(self): if self.current in [SCATTER, CHASE]: self.timer = 0 self.time = 7 self.current = FREIGHT elif self.current is FREIGHT: self.timer = 0
Then we modify the update method to keep track of how long we’re in freight mode.
def update(self, dt): self.mainmode.update(dt) if self.current is FREIGHT: self.timer += dt if self.timer >= self.time: self.time = None self.entity.normalMode() self.current = self.mainmode.mode else: self.current = self.mainmode.mode
We add these 2 methods to ghosts.py. As you can see they mainly control the speed of the ghosts when they’re in freight mode.
def startFreight(self): self.mode.setFreightMode() if self.mode.current == FREIGHT: self.setSpeed(50) self.directionMethod = self.randomDirection def normalMode(self): self.setSpeed(100) self.directionMethod = self.goalDirection
At this point, the ghost will slow to half its speed for 7 seconds when Pacman eats a power pellet. Nothing happens if they collide
Spawn Mode
After Pacman eats a ghost, it’ll have to travel its speed multiplied back to the spawn point. So we’ll set a spawn goal in the middle of that box.
We add this to the ‘startGame’ method in run.py.
def startGame(self):... self.ghost.setSpawnNode(self.nodes.getNodeFromTiles(2+11.5, 3+14))
‘setSpawnMode’ defines the node we want to use. ‘spawn’ sets the location.
We add these next 3 methods in ghosts.py. The ‘startSpawn’ method is similar to ‘startFreight’ in that it checks to make sure we can start the SPAWN mode, and if so we increase the ghost’s speed, set the goal for the spawn location, and set the ‘directionMethod’ since before, the ghost was in FREIGHT mode and moving around randomly.
def spawn(self): self.goal = self.spawnNode.positiondef setSpawnNode(self, node): self.spawnNode = nodedef startSpawn(self): self.mode.setSpawnMode() if self.mode.current == SPAWN: self.setSpeed(150) self.directionMethod = self.goalDirection self.spawn()
We’ll create a new method here that will set the current mode to SPAWN only if the ghost is in FREIGHT mode.
In the ‘update’ method in modes.py file, we’ll need to check to see when the ghost reaches the home so we can change his mode back. Remove the ‘else’ and replace it with the ‘elif’ statement as shown.
def update(self, dt):... elif self.current in [SCATTER, CHASE]: self.current = self.mainmode.mode if self.current is SPAWN: if self.entity.node == self.entity.spawnNode: self.entity.normalMode() self.current = self.mainmode.modedef setSpawnMode(self): if self.current is FREIGHT: self.current = SPAWN
Now for the ultimate point function, checking if Pacman has collided with a ghost. In pacman.py, we’re gonna create a method similar to the pellet collision one. Delete the 4 lines between the ‘for’ and ‘return’ statements in the ‘eatPellets’ method.
def eatPellets(self, pelletList): for pellet in pelletList: if self.collideCheck(pellet): return pellet return None def collideGhost(self, ghost): return self.collideCheck(ghost)def collideCheck(self, other): d = self.position - other.position dSquared = d.magnitudeSquared() rSquared = (self.collideRadius + other.collideRadius)**2 if dSquared <= rSquared: return True return False
Next we create a method in run.py that checks certain ghost events. Here we’ll see if Pacman has collided with the ghost, and if so we’ll check to see if the ghost is in FREIGHT mode. If he is, then we start his spawn mode. If he’s not, then Pacman dies.
When running, eat a power pellet then collide with the ghost and you’ll see that he’ll quickly rush off to the middle of the screen. When he gets there he will go back to normal.
def update(self):... self.checkGhostEvents() self.checkEvents() self.render()def checkGhostEvents(self): if self.pacman.collideGhost(self.ghost): if self.ghost.mode.current is FREIGHT: self.ghost.startSpawn()
At this point, when Pacman eats a ghost, the ghost will scatter to the home box and default to chase mode
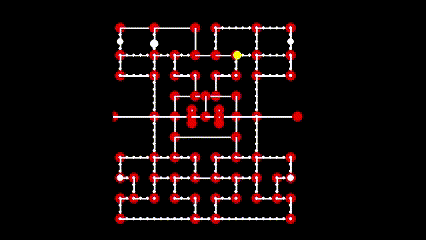
The Ghosts
The 4 ghosts are Blinky, Pinky, Inky, and Clyde. Their colors are red, pink, teal, and orange in that order.
Add this to the constants.py file
PINK = (255,100,150)TEAL = (100,255,255)ORANGE = (230,190,40)...BLINKY = 4PINKY = 5INKY = 6CLYDE = 7
And now we’re gonna make the ghost classes in ghost.py. Starting with Blinky
class Ghost(Entity): def __init__(self, node, pacman=None, blinky=None):... self.blinky = blinky self.homeNode = node
class Blinky(Ghost): def __init__(self, node, pacman=None, blinky=None): Ghost.__init__(self, node, pacman, blinky) self.name = BLINKY self.color = RED
Unlike Blinky who simply chases Pacman, Pinky tried to hit him head-on. It does this by identifying Pacman’s position and targeting 4 tiles ahead of him.
class Pinky(Ghost): def __init__(self, node, pacman=None, blinky=None): Ghost.__init__(self, node, pacman, blinky) self.name = PINKY self.color = PINK def scatter(self): self.goal = Vector2(TILEWIDTH*NCOLS, 0) def chase(self): self.goal = self.pacman.position + self.pacman.directions[self.pacman.direction] * TILEWIDTH * 4
Inky does the same thing but a little more precise. He targets 2 tiles ahead of Pacman’s position, subtract Blinky’s position, then multiply the result by 2.
class Inky(Ghost): def __init__(self, node, pacman=None, blinky=None): Ghost.__init__(self, node, pacman, blinky) self.name = INKY self.color = TEAL def scatter(self): self.goal = Vector2(TILEWIDTH*NCOLS, TILEHEIGHT*NROWS) def chase(self): vec1 = self.pacman.position + self.pacman.directions[self.pacman.direction] * TILEWIDTH * 2 vec2 = (vec1 - self.blinky.position) * 2 self.goal = self.blinky.position + vec2
Clyde is more random. If he’s less than 8 tiles away from Pacman, he retreats to his scatter goal in the bottom left corner. If he’s far away enough, he acts like Pinky.
class Clyde(Ghost): def __init__(self, node, pacman=None, blinky=None): Ghost.__init__(self, node, pacman, blinky) self.name = CLYDE self.color = ORANGE def scatter(self): self.goal = Vector2(0, TILEHEIGHT*NROWS) def chase(self): d = self.pacman.position - self.position ds = d.magnitudeSquared() if ds <= (TILEWIDTH * 8)**2: self.scatter() else: self.goal = self.pacman.position + self.pacman.directions[self.pacman.direction] * TILEWIDTH * 4
We’ll deal with the ghosts as a group rather than individually.
We’ll store all the ghost objects in a list. The ‘__iter__’ method allows us to loop through the ghost list in a convenient fashion.
So in all of these methods, we just loop through the ghosts list and perform the action on each ghost. Notice the ‘updatePoints’ and ‘resetPoints’ methods. So when Pacman eats a ghost he gets 200 points, when he eats the second ghost he gets 400 points, then 800 points, and finally 1600 points. Basically, the points a ghost is worth doubles every time he eats one. When Pacman eats a new power pellet those points reset back to 200. So to maximize your score you want to eat all of the ghosts for each of the 4 power pellets.
class GhostGroup(object): def __init__(self, node, pacman): self.blinky = Blinky(node, pacman) self.pinky = Pinky(node, pacman) self.inky = Inky(node, pacman, self.blinky) self.clyde = Clyde(node, pacman) self.ghosts = [self.blinky, self.pinky, self.inky, self.clyde] def __iter__(self): return iter(self.ghosts) def update(self, dt): for ghost in self: ghost.update(dt) def startFreight(self): for ghost in self: ghost.startFreight() self.resetPoints() def setSpawnNode(self, node): for ghost in self: ghost.setSpawnNode(node) def updatePoints(self): for ghost in self: ghost.points *= 2 def resetPoints(self): for ghost in self: ghost.points = 200 def reset(self): for ghost in self: ghost.reset() def hide(self): for ghost in self: ghost.visible = False def show(self): for ghost in self: ghost.visible = True def render(self, screen): for ghost in self: ghost.render(screen)
In run.py, we’re gonna run the GhostGroup class instead of just Ghost. Any method that says ‘ghost’ we change it to ‘ghosts’. Also, change the ‘Ghost’ import to ‘GhostGroup’. Also, delete the 3 lines in ‘checkGhostEvents’ and replace it with the 4 shown
from ghosts import GhostGroup def startGame(self): ... self.ghosts = GhostGroup(self.nodes.getStartTempNode(), self.pacman self.ghosts.setSpawnNode(self.nodes.getNodeFromTiles(2+11.5, 3+14)) def update(self): self.pacman.update(dt) self.ghosts.update(dt) def checkPelletEvents(self): ... self.ghosts.startFreight() def checkGhostEvents(self): for ghost in self.ghosts: if self.pacman.collideGhost(ghost): if ghost.mode.current is FREIGHT: ghost.startSpawn() def render(self): ... self.ghosts.render(self.screen) pygame.display.update()
At this point, there are 4 ghosts with their own colors and movement patterns. They still scatter back to the home box when eaten.

Start Positions
Pacman starts below the ghost home. Not directly on a node, but between 2 nodes. Blinky starts directly above the ghost home, outside of it. Pinky starts below Blinky in the ghost home. Inky starts to the left of Pinky, and Clyde starts to the right of Pinky.
We pass in the nodes in the ‘startGame’ method in the run.py file. The ‘self.pacman’ replaces the one that’s already there
- Pacman: Starts between nodes at (12,26) and (15, 26)
- Blinky: Starts on node at (2, 0) of the homedata array. Remember for all of the ghosts we have to add the offset values of (11.5, 14). So Blinky’s node is really at (2, 0) + (11.5, 14) = (13.5, 14)
- Pinky: Starts on node at (2, 3) of the homedata array. Remember for all of the ghosts we have to add the offset values of (11.5, 14). So Pinky’s node is really at (2, 3) + (11.5, 14) = (13.5, 17)
- Inky: Starts on node at (0, 3) of the homedata array. Remember for all of the ghosts we have to add the offset values of (11.5, 14). So Inky’s node is really at (0, 3) + (11.5, 14) = (11.5, 17)
- Clyde: Starts on node at (4, 3) of the homedata array. Remember for all of the ghosts we have to add the offset values of (11.5, 14). So Clyde’s node is really at (4, 3) + (11.5, 14) = (15.5, 17)
First, in the ‘self.pacman’ line, we’re gonna replace the ‘getStartTempNode’ with ‘getNodeFromTiles’ and the node values after that. Then we add a line for each ghost in between the last 2 ‘self.ghosts’ lines.
def startGame(self):... self.pacman = Pacman(self.nodes.getNodeFromTiles(15, 26)) self.pellets = PelletGroup("maze1.txt") self.ghosts = GhostGroup(self.nodes.getStartTempNode(), self.pacman) self.ghosts.blinky.setStartNode(self.nodes.getNodeFromTiles(2+11.5, 0+14)) self.ghosts.pinky.setStartNode(self.nodes.getNodeFromTiles(2+11.5, 3+14)) self.ghosts.inky.setStartNode(self.nodes.getNodeFromTiles(0+11.5, 3+14)) self.ghosts.clyde.setStartNode(self.nodes.getNodeFromTiles(4+11.5, 3+14)) self.ghosts.setSpawnNode(self.nodes.getNodeFromTiles(2+11.5, 3+14)
Next in entity.py, we modify it to set it to ‘node’ and ‘target’ and then call the ‘setPosition’ method. We’re deleting the 3 lines from ‘self.node’ to ‘self.target’.
class Entity(object): def __init__(self, node):... self.directionMethod = self.randomDirection self.setStartNode(node) def setStartNode(self, node): self.node = node self.startNode = node self.target = node self.setPosition()
Next we’re gonna make Pacman move at the start of the game. As of now he’ll just be stationary on that first node. We add this to pacman.py
class Pacman(object): def __init__(self, node):... self.color = YELLOW self.direction = LEFT
At this point, Pacman and the ghosts all start on their assigned nodes. Blinky and Pinky start moving right off the bat. Inky and Clyde circle around in the ghost home before finally coming out. Before adding that ‘self.direction’ line in the init of pacman.py, he’s still. With it, he starts moving off the bat too.
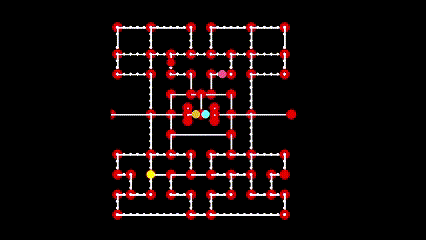
Fruit
This is simple. The fruit appears at the middle of the board below the ghost home. If Pacman doesn’t collide with it before the timer runs out, the fruit disappears. In Ms. Pacman, the fruit moves around, but we’ll keep it still for this game.
We’ll add green in RGB and fruit = 8 to constants.py.
...GREEN = (0, 255, 0)...PACMAN = 0PELLET = 1POWERPELLET = 2GHOST = 3BLINKY = 4PINKY = 5INKY = 6CLYDE = 7FRUIT = 8
Now we’re gonna create a new file of fruit.py. The fruit will appear between 2 nodes and only last 5 seconds.
import pygamefrom entity import Entityfrom constants import *class Fruit(Entity): def __init__(self, node): Entity.__init__(self, node) self.name = FRUIT self.color = GREEN self.lifespan = 5 self.timer = 0 self.destroy = False self.points = 100 self.setBetweenNodes(RIGHT) def update(self, dt): self.timer += dt if self.timer >= self.lifespan: self.destroy = True
This next code is for setting any entity between 2 nodes in entity.py.
def setBetweenNodes(self, direction): if self.node.neighbors[direction] is not None: self.target = self.node.neighbors[direction] self.position = (self.node.position + self.target.position) / 2.0
For Pacman starting between nodes, we add this line to pacman.py
class Pacman(Entity): def __init__(self, node): ... self.direction = LEFT self.setBetweenNodes(LEFT)
Then we make our changes to the Gamecontroller in run.py
from fruit import Fruitclass GameController(object): def __init__(self):... self.fruit = None def update(self): ... self.pellets.update(dt) if self.fruit is not None: self.fruit.update(dt) self.checkPelletEvents() self.checkGhostEvents() self.checkFruitEvents() self.checkEvents() def checkFruitEvents(self): if self.pellets.numEaten == 50 or self.pellets.numEaten == 140: if self.fruit is None: self.fruit = Fruit(self.nodes.getNodeFromTiles(9, 20)) if self.fruit is not None: if self.pacman.collideCheck(self.fruit): self.fruit = None elif self.fruit.destroy: self.fruit = None def render(self): ... self.pellets.render(self.screen) if self.fruit is not None: self.fruit.render(self.screen) self.pacman.render(self.screen) ...
We now have the mechanics for the fruit in place, but we’ll have to add the actual fruit later on.
Pausing
There are 5 events that pause the game
- Pressing the space bar. If the game is already paused, then this unpauses it. This will be a switch.
- Pacman eats a ghost. The game pauses for a little bit when this happens. It may look like a glitch.
- Game is paused at the start of a level. Similar to #1
- Level complete
- Pacman’s death
We’re creating a new pauser.py file.
class Pause(object): def __init__(self, paused=False): self.paused = paused self.timer = 0 self.pauseTime = None self.func = None def update(self, dt): if self.pauseTime is not None: self.timer += dt if self.timer >= self.pauseTime: self.timer = 0 self.paused = False self.pauseTime = None return self.func return None def setPause(self, playerPaused=False, pauseTime=None, func=None): self.timer = 0 self.func = func self.pauseTime = pauseTime self.flip() def flip(self): self.paused = not self.paused
And then we modify the Gamecontroller in run.py
from pauser import Pauseclass GameController(object): def __init__(self): ... self.pause = Pause(True) def update(self): self.pellets.update(dt) if not self.pause.paused: self.pacman.update(dt) self.ghosts.update(dt)... self.checkFruitEvents() afterPauseMethod = self.pause.update(dt) if afterPauseMethod is not None: afterPauseMethod() self.checkEvents()
Next we add to the ‘checkEvents’ method to check if the user has pressed the spacebar.
def checkEvents(self): for event in pygame.event.get(): if event.type == QUIT: exit() elif event.type == KEYDOWN: if event.key == K_SPACE: self.pause.setPause(playerPaused=True) if not self.pause.paused: self.showEntities() else: self.hideEntities()
These next 2 events will un/hide entities when we need to.
def checkGhostEvents(self):... if ghost.mode.current is FREIGHT: self.pacman.visible = False ghost.visible = False self.pause.setPause(pauseTime=1, func=self.showEntities) ghost.startSpawn()def showEntities(self): self.pacman.visible = True self.ghosts.show()def hideEntities(self): self.pacman.visible = False self.ghosts.hide()
At this point, the game is paused when you run it. It won’t start until you press the spacebar. If you press it during the game, it’ll pause, and the entities disappear while it’s paused. These are the only 2 events that pause the game as of now.
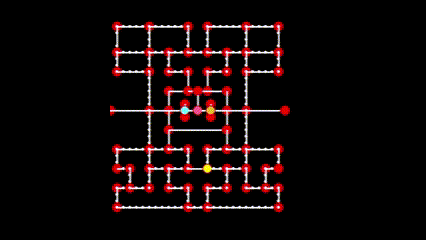
Level Advancing
Up to this point, nothing happens when Pacman eats all the pellets. This is telling the game what to do when all the pellets are gone. In run.py
class GameController(object): def __init__(self): ... self.level = 0 def nextLevel(self): self.level += 1 self.pause.paused = True self.startGame()
Next in the ‘checkPelletEvents’ and ‘nextLevel’ methods, we’ll set the game to pause 3 secs when the last pellet is eaten.
def checkPelletEvents(self):... if self.pellets.isEmpty(): self.hideEntities() self.pause.setPause(pauseTime=3, func=self.nextLevel)def nextLevel(self): self.showEntities() ...
At this point, when all the pellets are eaten, the game will reset and bring them back. There is also a brief pause when Pacman eats a ghost.

Death to Pacman
Pacman dying means 4 things
- When he dies, the game pauses for 3 secs
- The level needs to reset, except for the pellets
- We have to give him some lights
- If all lives are lost, the game is over
Here’s the code to give him some lives in run.py
class GameController(object): def __init__(self): ... self.lives = 5 def restartGame(self): self.lives = 5 self.level = 0 self.pause.paused = True self.fruit = None self.startGame() def resetLevel(self): self.pause.paused = True self.pacman.reset() self.ghosts.reset() self.fruit = None
We don’t need to start the whole level over, just reset Pacman’s position and a few other variables. Like the ghosts. In entity.py
def reset(self): self.setStartNode(self.startNode) self.direction = STOP self.speed = 100 self.visible = True
For Pacman, we override the basic reset method from the Entity class and add a couple more things. We need to set Pacman’s initial direction to LEFT and place him between the 2 nodes discussed previously. In pacman.py
class Pacman(Entity): def __init__(self, node): ... self.alive = True def reset(self): Entity.reset(self) self.direction = LEFT self.setBetweenNodes(LEFT) self.alive = True def die(self): self.alive = False self.direction = STOP
This is for resetting ghosts. In ghosts.py
def reset(self): Entity.reset(self) self.points = 200 self.directionMethod = self.goalDirection
Next in run.py we check if Pacman has collided with a ghost. If it’s not in spawn mode, then Pacman is killed. His lives are reduced by 1 then we check if he has any more lives left. If he does, we reset the game. If he doesn’t, we restart it. Either way, the game will pause 3 seconds during this operation.
def checkGhostEvents(self):... ghost.startSpawn() elif ghost.mode.current is not SPAWN: if self.pacman.alive: self.lives -= 1 self.pacman.die() self.ghosts.hide() if self.lives <= 0: self.pause.setPause(pauseTime=3, func=self.restartGame) else: self.pause.setPause(pauseTime=3, func=self.resetLevel)
Lastly we’re gonna add a line to the ‘checkEvents’ method in run.py to make sure we can’t pause while Pacman is dying
def checkEvents(self):... if event.key == K_SPACE: if self.pacman.alive: self.pause.setPause(playerPaused=True)...
An error returns when Pacman collides with a ghost. I don’t feel like dealing with it, so this is the main game-breaking bug I’m gonna leave in.
Node Restrictions
Once a ghost runs home after it’s eaten, it goes back to either scatter or chase mode. There’s a glitch where it can get stuck inside the home when it’s in chase mode and Pacman is directly below the home. There’s only 1 exit out of the home and that’s up. Pacman is also able to enter the home and ghosts are too outside of spawn mode. We have to restrict them from entering this region while allowing them to under certain conditions.
In nodes.py we add a dictionary and 2 new methods. One to allow access and one to deny it.
def __init__(self, x, y):... self.access = {UP:[PACMAN, BLINKY, PINKY, INKY, CLYDE, FRUIT], DOWN:[PACMAN, BLINKY, PINKY, INKY, CLYDE, FRUIT], LEFT:[PACMAN, BLINKY, PINKY, INKY, CLYDE, FRUIT], RIGHT:[PACMAN, BLINKY, PINKY, INKY, CLYDE, FRUIT]}def denyAccess(self, direction, entity): if entity.name in self.access[direction]: self.access[direction].remove(entity.name)def allowAccess(self, direction, entity): if entity.name not in self.access[direction]: self.access[direction].append(entity.name)
In entity.py, we’re gonna add a line to check if a entity has access to move in a certain direction on a node.
def validDirection(self, direction): if direction is not STOP: if self.name in self.node.access[direction]: if self.node.neighbors[direction] is not None:
Next we add some more methods to nodes.py to restrict/allow access to a node’s direction
def denyAccess(self, col, row, direction, entity): node = self.getNodeFromTiles(col, row) if node is not None: node.denyAccess(direction, entity) def allowAccess(self, col, row, direction, entity): node = self.getNodeFromTiles(col, row) if node is not None: node.allowAccess(direction, entity) def denyAccessList(self, col, row, direction, entities): for entity in entities: self.denyAccess(col, row, direction, entity) def allowAccessList(self, col, row, direction, entities): for entity in entities: self.allowAccess(col, row, direction, entity) def denyHomeAccess(self, entity): self.nodesLUT[self.homekey].denyAccess(DOWN, entity) def allowHomeAccess(self, entity): self.nodesLUT[self.homekey].allowAccess(DOWN, entity) def denyHomeAccessList(self, entities): for entity in entities: self.denyHomeAccess(entity) def allowHomeAccessList(self, entities): for entity in entities: self.allowHomeAccess(entity)
In run.py, we add these lines. For now, this restricts Pacman from moving into the ghost home, it prevents the ghosts from moving left and right when inside the home so they’ll never get stuck; when they’re in the middle of the home, their only valid direction is UP, we stop Inky from moving LEFT and Clyde from moving RIGHT so they can’t escape the home (we’ll get into why later), and we’re preventing the ghosts from entering the ghosts home; they shouldn’t be able to unless they’re in spawn mode.
def startGame(self): ... self.nodes.denyHomeAccess(self.pacman) self.nodes.denyHomeAccessList(self.ghosts) self.nodes.denyAccessList(2+11.5, 3+14, LEFT, self.ghosts) self.nodes.denyAccessList(2+11.5, 3+14, RIGHT, self.ghosts) self.ghosts.inky.startNode.denyAccess(RIGHT, self.ghosts.inky) self.ghosts.clyde.startNode.denyAccess(LEFT, self.ghosts.clyde) self.nodes.denyAccessList(12, 14, UP, self.ghosts) self.nodes.denyAccessList(15, 14, UP, self.ghosts) self.nodes.denyAccessList(12, 26, UP, self.ghosts) self.nodes.denyAccessList(15, 26, UP, self.ghosts)
At this point, Inky and Clyde will bounce around in the ghost home without ever leaving, and if you eat Blinky or Pinky, they’ll only circle around the home indefinitely since we restricted their access.
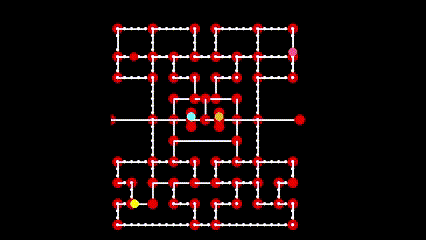
Add this line to the ‘checkGhostEvents’ method in run.py. Its name speaks for itself.
def checkGhostEvents(self): ghost.startSpawn() self.nodes.allowHomeAccess(ghost) elif ghost.mode.current is not SPAWN:
And this to the ‘normalMode’ method in ghost.py. This maintains the restriction since there’s only one circumstance when ghosts should be going in the home box.
def normalMode(self):... self.homeNode.denyAccess(DOWN, self)
Now the ghost will enter the home after it’s eaten.

At this point, Inky and Clyde aren’t allowed to leave. These next lines make it so Inky can leave when Pacman eats 30 pellets and Clyde can leave when he eats 70. In run.py
def checkPelletEvents(self):self.pellets.numEaten += 1 if self.pellets.numEaten == 30: self.ghosts.inky.startNode.allowAccess(RIGHT, self.ghosts.inky) if self.pellets.numEaten == 70: self.ghosts.clyde.startNode.allowAccess(LEFT, self.ghosts.clyde) self.pellets.pelletList.remove(pellet)
At this point, Inky will leave the home when Pacman eats 30 pellets, and Clyde leaves when he eats 70. The overall mechanics of the game are done. Everything after this is for aesthetics; like points, life icons, and character animations
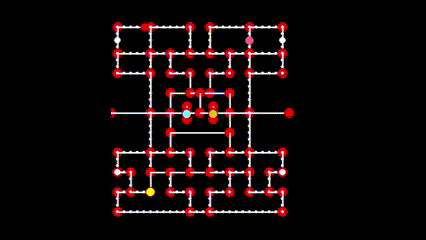
Text
As with any game, we need text to label different features.
We can fit three lines of text where each character is 16 pixels high. Below is a list of all of the texts that we need to display to the player while the game is being played.
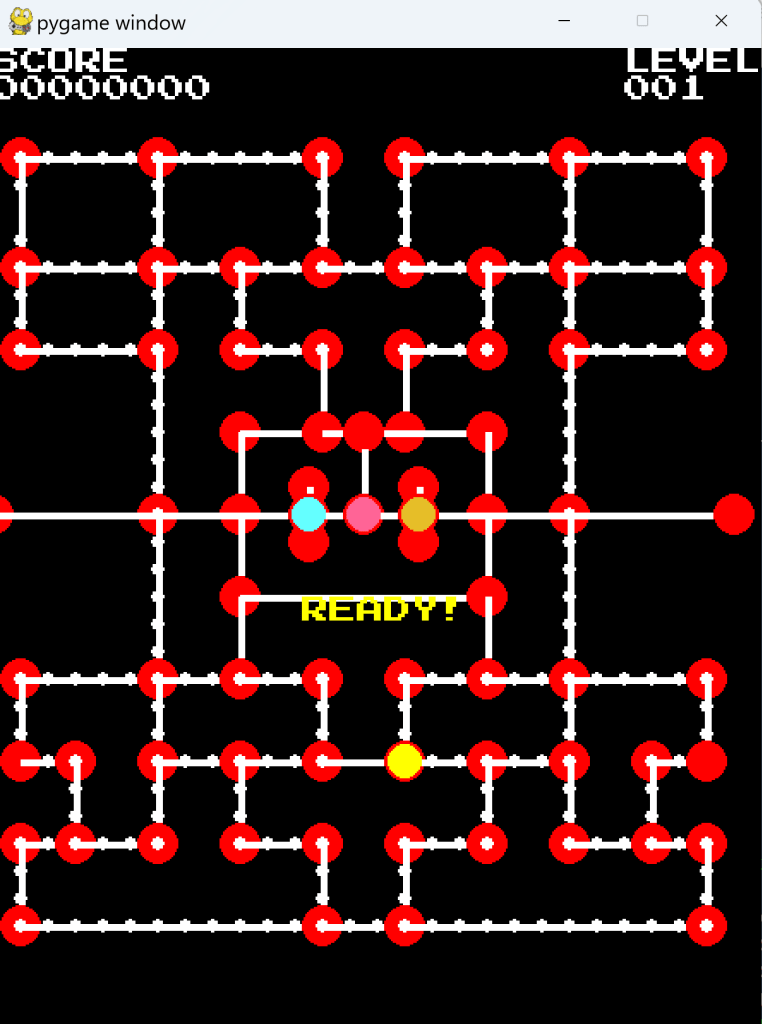
- “SCORE“: This should be placed in the top left of the screen and have a height of 16 pixels. This is just a label string and does not change.
- “LEVEL“: This should be placed in the top right corner of the screen and have a height of 16 pixels. This is just a label string and does not change.
- score value: This is the actual numbered score which should be placed underneath the “SCORE” label. This will actively change.
- level value: This is the actual numbered level which should be placed underneath the “LEVEL” label.
- “READY!“: This displays in the middle of the screen whenever the game begins or when the level restarts. It goes away when the player presses the space key to start the level. This text should be yellow.
- “PAUSED“: This displays in the middle of the screen when the player pauses the game by pressing the space key. It disappears when the game is unpaused. It appears in the same location as the “READY!“.
- “GAME OVER“: This displays in the middle of the screen when the player loses all lives. This text is in the same location as the previous two labels. This text should be red.
- ghost/fruit value: When Pacman eats a ghost or a fruit the value of either appears in their location. This text is white and should be 8 pixels high.
We’re creating a new file, text.py.
Every text we create has a color, size, id, and x,y position. It can also have a lifespan if we only want to display it for a certain period of time. We can also make text invisible. We’re using the PressStart2P font which is used for old-school arcade games. When you download it, make sure you add it to the folder where you’re keeping the game files, otherwise it won’t recognize the font.
This initializes all the text
import pygamefrom vector import Vector2from constants import *class Text(object): def __init__(self, text, color, x, y, size, time=None, id=None, visible=True): self.id = id self.text = text self.color = color self.size = size self.visible = visible self.position = Vector2(x, y) self.timer = 0 self.lifespan = time self.label = None self.destroy = False self.setupFont("PressStart2P-Regular.ttf") self.createLabel() def setupFont(self, fontpath): self.font = pygame.font.Font(fontpath, self.size) def createLabel(self): self.label = self.font.render(self.text, 1, self.color) def setText(self, newtext): self.text = str(newtext) self.createLabel() def update(self, dt): if self.lifespan is not None: self.timer += dt if self.timer >= self.lifespan: self.timer = 0 self.lifespan = None self.destroy = True def render(self, screen): if self.visible: x, y = self.position.asTuple() screen.blit(self.label, (x, y))
Also add these to constants.py
SCORETXT = 0LEVELTXT = 1READYTXT = 2PAUSETXT = 3GAMEOVERTXT = 4
Add this to text.py. We just told the system that we would like to have texts in this game. So this is where we actually make the texts happen.
class TextGroup(object): def __init__(self): self.nextid = 10 self.alltext = {} self.setupText() self.showText(READYTXT) def addText(self, text, color, x, y, size, time=None, id=None): self.nextid += 1 self.alltext[self.nextid] = Text(text, color, x, y, size, time=time, id=id) return self.nextid def removeText(self, id): self.alltext.pop(id) def setupText(self): size = TILEHEIGHT self.alltext[SCORETXT] = Text("0".zfill(8), WHITE, 0, TILEHEIGHT, size) self.alltext[LEVELTXT] = Text(str(1).zfill(3), WHITE, 23*TILEWIDTH, TILEHEIGHT, size) self.alltext[READYTXT] = Text("READY!", YELLOW, 11.25*TILEWIDTH, 20*TILEHEIGHT, size, visible=False) self.alltext[PAUSETXT] = Text("PAUSED!", YELLOW, 10.625*TILEWIDTH, 20*TILEHEIGHT, size, visible=False) self.alltext[GAMEOVERTXT] = Text("GAMEOVER!", YELLOW, 10*TILEWIDTH, 20*TILEHEIGHT, size, visible=False) self.addText("SCORE", WHITE, 0, 0, size) self.addText("LEVEL", WHITE, 23*TILEWIDTH, 0, size) def update(self, dt): for tkey in list(self.alltext.keys()): self.alltext[tkey].update(dt) if self.alltext[tkey].destroy: self.removeText(tkey) def showText(self, id): self.hideText() self.alltext[id].visible = True def hideText(self): self.alltext[READYTXT].visible = False self.alltext[PAUSETXT].visible = False self.alltext[GAMEOVERTXT].visible = False def updateScore(self, score): self.updateText(SCORETXT, str(score).zfill(8)) def updateLevel(self, level): self.updateText(LEVELTXT, str(level + 1).zfill(3)) def updateText(self, id, value): if id in self.alltext.keys(): self.alltext[id].setText(value) def render(self, screen): for tkey in list(self.alltext.keys()): self.alltext[tkey].render(screen)
Now we import it and make these additions to run.py.
from text import TextGroupclass GameController(object): def __init__(self): ... self.score = 0 self.textgroup = TextGroup() def update(self): dt = self.clock.tick(30) / 1000.0 self.textgroup.update(dt) ...def updateScore(self, points): self.score += points self.textgroup.updateScore(self.score)
Still in run.py, we keep the text present when paused
def checkEvents(self):...if not self.pause.paused: self.textgroup.hideText() self.showEntities() else: self.textgroup.showText(PAUSETXT)
Still in run.py, we show the ghost points
def checkGhostEvents(self):...ghost.visible = False self.updateScore(ghost.points) self.textgroup.addText(str(ghost.points), WHITE, ghost.position.x, ghost.position.y, 8, time=1) self.ghosts.updatePoints() self.pause.setPause(pauseTime=1, func=self.showEntities)if self.lives <= 0: self.textgroup.showText(GAMEOVERTXT) self.pause.setPause(pauseTime=3, func=self.restartGame)
Next we show the fruit points
def checkFruitEvents(self):...self.updateScore(self.fruit.points) self.textgroup.addText(str(self.fruit.points), WHITE, self.fruit.position.x, self.fruit.position.y, 8, time=1)
Lastly we add these to update the score as it grows
def checkPelletEvents(self): pellet = self.pacman.eatPellets(self.pellets.pelletList) if pellet: self.pellets.numEaten += 1 self.updateScore(pellet.points) ...def nextLevel(self): ... self.textgroup.updateLevel(self.level)def restartGame(self): ... self.score = 0 self.textgroup.updateScore(self.score) self.textgroup.updateLevel(self.level) self.textgroup.showText(READYTXT) def resetLevel(self): ... self.textgroup.showText(READYTXT) def render(self): ... self.textgroup.render(self.screen) pygame.display.update()
At this point, the game texts are shown, and update as needed.
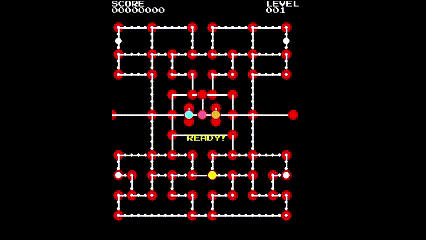
Sprites
Now we’re gonna add the graphics/images

Technically, the computer views all images as rectangles, regardless of what shape it appears to our eyes. A circle’s position is from its center, and a rectangle’s is from its upper-left corner. As you may know, all animations are still images spliced together to give the illusion of movement. This sprite sheet contains all possible images that can be shown in the game.
We’ll make a new file called sprite.py. These tiles are 16×16, but they can be changed. The image needs to be ‘loaded’ in. We’re using pink as the transparent color since the game ignores it when drawing sprites.
import pygamefrom constants import *import numpy as npBASETILEWIDTH = 16BASETILEHEIGHT = 16class Spritesheet(object): def __init__(self): self.sheet = pygame.image.load("spritesheet.png").convert() transcolor = self.sheet.get_at((0,0)) self.sheet.set_colorkey(transcolor) width = int(self.sheet.get_width() / BASETILEWIDTH * TILEWIDTH) height = int(self.sheet.get_height() / BASETILEHEIGHT * TILEHEIGHT) self.sheet = pygame.transform.scale(self.sheet, (width, height)) def getImage(self, x, y, width, height): x *= TILEWIDTH y *= TILEHEIGHT self.sheet.set_clip(pygame.Rect(x, y, width, height)) return self.sheet.subsurface(self.sheet.get_clip())
Then we add Pacman’s sprites
class PacmanSprites(Spritesheet): def __init__(self, entity): Spritesheet.__init__(self) self.entity = entity self.entity.image = self.getStartImage() def getStartImage(self): return self.getImage(8, 0) def getImage(self, x, y): return Spritesheet.getImage(self, x, y, 2*TILEWIDTH, 2*TILEHEIGHT)
Then the ghosts’
class GhostSprites(Spritesheet): def __init__(self, entity): Spritesheet.__init__(self) self.x = {BLINKY:0, PINKY:2, INKY:4, CLYDE:6} self.entity = entity self.entity.image = self.getStartImage() def getStartImage(self): return self.getImage(self.x[self.entity.name], 4) def getImage(self, x, y): return Spritesheet.getImage(self, x, y, 2*TILEWIDTH, 2*TILEHEIGHT)
And the fruits’
class FruitSprites(Spritesheet): def __init__(self, entity): Spritesheet.__init__(self) self.entity = entity self.entity.image = self.getStartImage() def getStartImage(self): return self.getImage(16, 8) def getImage(self, x, y): return Spritesheet.getImage(self, x, y, 2*TILEWIDTH, 2*TILEHEIGHT)
Make these changes in entity.py
class Entity(object): def __init__(self, node): ... self.image = None def render(self, screen): if self.visible: if self.image is not None: screen.blit(self.image, self.position.asTuple()) else: p = self.position.asInt() pygame.draw.circle(screen, self.color, p, self.radius)
Then we add the final touches to Pacman, the ghosts, and fruit, all in their own files.
First in pacman.py
from sprites import PacmanSpritesclass Pacman(Entity): def __init__(self, node): ... self.sprites = PacmanSprites(self)
Then in ghosts.py, we import the sprites and add a line to each ghost
...from sprites import GhostSpritesclass Blinky(Ghost): def __init__(self, node, pacman=None, blinky=None): ... self.sprites = GhostSprites(self)class Pinky(Ghost): def __init__(self, node, pacman=None, blinky=None): ... self.sprites = GhostSprites(self)class Inky(Ghost): def __init__(self, node, pacman=None, blinky=None): ... self.sprites = GhostSprites(self)class Clyde(Ghost): def __init__(self, node, pacman=None, blinky=None): ... self.sprites = GhostSprites(self)
And lastly we do it for fruits; in fruits.py
...from sprites import FruitSpritesclass Fruit(Entity): def __init__(self, node): ... self.sprites = FruitSprites(self)
At this point, the ghosts now have their OG appearances. Pacman is still a yellow circle and he’s off-center
Life Icons
We’ll start with 5 lives. Add this to sprites.py.
class LifeSprites(Spritesheet): def __init__(self, numlives): Spritesheet.__init__(self) self.resetLives(numlives) def removeImage(self): if len(self.images) > 0: self.images.pop(0) def resetLives(self, numlives): self.images = [] for i in range(numlives): self.images.append(self.getImage(0,0)) def getImage(self, x, y): return Spritesheet.getImage(self, x, y, 2*TILEWIDTH, 2*TILEHEIGHT)
And import into run.py adding a few more lines. As always, we’re connecting the feature to the main game controller.
from sprites import LifeSpritesclass GameController(object): def __init__(self): ... self.lifesprites = LifeSprites(self.lives) def checkGhostEvents(self):... self.lives -= 1 self.lifesprites.removeImage()...def restartGame(self): ... self.lifesprites.resetLives(self.lives)
Then add this to the ‘render’ method still in run.py. This draws the life icons in the bottom-left corner of the screen.
 def render(self):
        ***

        for i in range(len(self.lifesprites.images)):
            x = self.lifesprites.images[i].get_width() * i
            y = SCREENHEIGHT - self.lifesprites.images[i].get_height()
            self.screen.blit(self.lifesprites.images[i], (x, y))

        pygame.display.update()
The life icons will now appear in the bottom-left part of the screen.
Graphical Mazes
Now we’re gonna replace the nodes with an actual maze. This whole time we’ve been using a sketch, now we’re doing the actual drawing. There are 10 sprites that define a maze layout. Each sprite can be rotated 90, 180, and 270 degrees. We can use one sprite for the top-left corner, then rotate the others for the other corners.
In our maze1.txt file, we’re gonna replace some of the X’s with 0-9s to define the tile sprites used.
X X X X X X X X X X X X X X X X X X X X X X X X X X X XX X X X X X X X X X X X X X X X X X X X X X X X X X X XX X X X X X X X X X X X X X X X X X X X X X X X X X X X0 1 1 1 1 1 1 1 1 1 1 1 1 7 8 1 1 1 1 1 1 1 1 1 1 1 1 01 + . . . . + . . . . . + 3 3 + . . . . . + . . . . + 11 . 2 3 3 2 . 2 3 3 3 2 . 3 3 . 2 3 3 3 2 . 2 3 3 2 . 11 p 3 X X 3 . 3 X X X 3 . 3 3 . 3 X X X 3 . 3 X X 3 p 11 . 2 3 3 2 . 2 3 3 3 2 . 2 2 . 2 3 3 3 2 . 2 3 3 2 . 11 + . . . . + . . + . . + . . + . . + . . + . . . . + 11 . 2 3 3 2 . 2 2 . 2 3 3 3 3 3 3 2 . 2 2 . 2 3 3 2 . 11 . 2 3 3 2 . 3 3 . 2 3 3 9 9 3 3 2 . 3 3 . 2 3 3 2 . 11 + . . . . + 3 3 + . . + 3 3 + . . + 3 3 + . . . . + 10 1 1 1 1 6 . 3 9 3 3 2 | 3 3 | 2 3 3 9 3 . 6 1 1 1 1 0X X X X X 1 . 3 9 3 3 2 | 2 2 | 2 3 3 9 3 . 1 X X X X XX X X X X 1 . 3 3 n - - n - - n - - n 3 3 . 1 X X X X XX X X X X 1 . 3 3 | 4 5 5 = = 5 5 4 | 3 3 . 1 X X X X X1 1 1 1 1 6 . 2 2 | 5 X X X X X X 5 | 2 2 . 6 1 1 1 1 1n - - - - - + - - n 5 X X X X X X 5 n - - + - - - - - n1 1 1 1 1 6 . 2 2 | 5 X X X X X X 5 | 2 2 . 6 1 1 1 1 1X X X X X 1 . 3 3 | 4 5 5 5 5 5 5 4 | 3 3 . 1 X X X X XX X X X X 1 . 3 3 n - - - - - - - - n 3 3 . 1 X X X X XX X X X X 1 . 3 3 | 2 3 3 3 3 3 3 2 | 3 3 . 1 X X X X X0 1 1 1 1 6 . 2 2 | 2 3 3 9 9 3 3 2 | 2 2 . 6 1 1 1 1 01 + . . . . + . . + . . + 3 3 + . . + . . + . . . . + 11 . 2 3 3 2 . 2 3 3 3 2 . 3 3 . 2 3 3 3 2 . 2 3 3 2 . 11 . 2 3 9 3 . 2 3 3 3 2 . 2 2 . 2 3 3 3 2 . 3 9 3 2 . 11 P . + 3 3 + . . + . . + - - + . . + . . + 3 3 + . P 18 3 2 . 3 3 . 2 2 . 2 3 3 3 3 3 3 2 . 2 2 . 3 3 . 2 3 77 3 2 . 2 2 . 3 3 . 2 3 3 9 9 3 3 2 . 3 3 . 2 2 . 2 3 81 + . + . . + 3 3 + . . + 3 3 + . . + 3 3 + . . + . + 11 . 2 3 3 3 3 9 9 3 3 2 . 3 3 . 2 3 3 9 9 3 3 3 3 2 . 11 . 2 3 3 3 3 3 3 3 3 2 . 2 2 . 2 3 3 3 3 3 3 3 3 2 . 11 + . . . . . . . . . . + . . + . . . . . . . . . . + 10 1 1 1 1 1 1 1 1 1 1 1 1 1 1 1 1 1 1 1 1 1 1 1 1 1 1 0X X X X X X X X X X X X X X X X X X X X X X X X X X X XX X X X X X X X X X X X X X X X X X X X X X X X X X X X
And add this to sprites.py
class MazeSprites(Spritesheet): def __init__(self, mazefile): Spritesheet.__init__(self) self.data = self.readMazeFile(mazefile) def getImage(self, x, y): return Spritesheet.getImage(self, x, y, TILEWIDTH, TILEHEIGHT) def readMazeFile(self, mazefile): return np.loadtxt(mazefile, dtype='<U1') def constructBackground(self, background, y): for row in list(range(self.data.shape[0])): for col in list(range(self.data.shape[1])): if self.data[row][col].isdigit(): x = int(self.data[row][col]) + 12 sprite = self.getImage(x, y) background.blit(sprite, (col*TILEWIDTH, row*TILEHEIGHT)) elif self.data[row][col] == '=': sprite = self.getImage(10, 8) background.blit(sprite, (col*TILEWIDTH, row*TILEHEIGHT)) return background
Then modify the run.py with these 2 lines. We put them under the ‘setBackground’ line since the maze is technically the background
from sprites import MazeSprites def startGame(self): self.setBackground() self.mazesprites = MazeSprites("maze1.txt") self.background = self.mazesprites.constructBackground(self.background, self.level%5)
At this point, the sprites are, present, but still kinda off. The sketch is still there too.
Graphical Mazes Pt 2
Create a maze_rotation.py file. It’ll look like the other maze file except this only has digits 0-3. Each digit represents the rotation of a sprite. 0 is none, 1 is 90 degrees, 2 is 180, and 3 is 270.
. . . . . . . . . . . . . . . . . . . . . . . . . . . .. . . . . . . . . . . . . . . . . . . . . . . . . . . .. . . . . . . . . . . . . . . . . . . . . . . . . . . .0 0 0 0 0 0 0 0 0 0 0 0 0 0 0 0 0 0 0 0 0 0 0 0 0 0 0 31 . . . . . . . . . . . . 1 3 . . . . . . . . . . . . 31 . 0 0 0 3 . 0 0 0 0 3 . 1 3 . 0 0 0 0 3 . 0 0 0 3 . 31 . 1 . . 3 . 1 . . . 3 . 1 3 . 1 . . . 3 . 1 . . 3 . 31 . 1 2 2 2 . 1 2 2 2 2 . 1 2 . 1 2 2 2 2 . 1 2 2 2 . 31 . . . . . . . . . . . . . . . . . . . . . . . . . . 31 . 0 0 0 3 . 0 3 . 0 0 0 0 0 0 0 3 . 0 3 . 0 0 0 3 . 31 . 1 2 2 2 . 1 3 . 1 2 2 3 0 2 2 2 . 1 3 . 1 2 2 2 . 31 . . . . . . 1 3 . . . . 1 3 . . . . 1 3 . . . . . . 31 2 2 2 2 3 . 1 1 0 0 3 . 1 3 . 0 0 0 2 3 . 0 2 2 2 2 2. . . . . 1 . 1 0 2 2 2 . 1 2 . 1 2 2 3 3 . 3 . . . . .. . . . . 1 . 1 3 . . . . . . . . . . 1 3 . 3 . . . . .. . . . . 1 . 1 3 . 0 0 0 . . 0 0 3 . 1 3 . 3 . . . . .0 0 0 0 0 2 . 1 2 . 1 . . . . . . 3 . 1 2 . 1 0 0 0 0 0. . . . . . . . . . 1 . . . . . . 3 . . . . . . . . . .2 2 2 2 2 3 . 0 3 . 1 . . . . . . 3 . 0 3 . 0 2 2 2 2 2. . . . . 1 . 1 3 . 1 2 2 2 2 2 2 2 . 1 3 . 3 . . . . .. . . . . 1 . 1 3 . . . . . . . . . . 1 3 . 3 . . . . .. . . . . 1 . 1 3 . 0 0 0 0 0 0 0 3 . 1 3 . 3 . . . . .0 0 0 0 0 2 . 1 2 . 1 2 2 3 0 2 2 2 . 1 2 . 1 0 0 0 0 31 . . . . . . . . . . . . 1 3 . . . . . . . . . . . . 31 . 0 0 0 3 . 0 0 0 0 3 . 1 3 . 0 0 0 0 3 . 0 0 0 3 . 31 . 1 2 3 3 . 1 2 2 2 2 . 1 2 . 1 2 2 2 2 . 1 0 2 2 . 31 . . . 1 3 . . . . . . . . . . . . . . . . 1 3 . . . 31 0 3 . 1 3 . 0 3 . 0 0 0 0 0 0 0 3 . 0 3 . 1 3 . 0 0 31 2 2 . 1 2 . 1 3 . 1 2 2 3 0 2 2 2 . 1 3 . 1 2 . 1 2 31 . . . . . . 1 3 . . . . 1 3 . . . . 1 3 . . . . . . 31 . 0 0 0 0 0 2 1 0 0 3 . 1 3 . 0 0 0 2 1 0 0 0 0 3 . 31 . 1 2 2 2 2 2 2 2 2 2 . 1 2 . 1 2 2 2 2 2 2 2 2 2 . 31 . . . . . . . . . . . . . . . . . . . . . . . . . . 31 2 2 2 2 2 2 2 2 2 2 2 2 2 2 2 2 2 2 2 2 2 2 2 2 2 2 2. . . . . . . . . . . . . . . . . . . . . . . . . . . .. . . . . . . . . . . . . . . . . . . . . . . . . . . .
Add these lines to sprites.py
class MazeSprites(Spritesheet): def __init__(self, mazefile, rotfile):Spritesheet.__init__(self) self.data = self.readMazeFile(mazefile) self.rotdata = self.readMazeFile(rotfile) def constructBackground(self, background, y):...sprite = self.getImage(x, y) rotval = int(self.rotdata[row][col]) sprite = self.rotate(sprite, rotval)...return backgrounddef rotate(self, sprite, value): return pygame.transform.rotate(sprite, value*90)
Then add the file into run.py
def startGame(self): self.setBackground() self.mazesprites = MazeSprites("maze1.txt", "maze1_rotation.txt")
We can remove the ‘self.nodes.render’ line in the ‘render’ method
In pellets.py, replace the ‘self.radius’ and ‘collideRadius’ lines in the ‘init’ method with the 2 lines shown, and the ‘p’ in the ‘render’ method below that.
class Pellet(object): def __init__(self, row, column):... self.color = WHITEself.radius = int(2 * TILEWDITH / 16) self.collideRadius = int(2 * TILEWIDTH / 16) def render(self, screen): if self.visible:adjust = Vector2(TILEWIDTH, TILEHEIGHT) / 2 p = self.position + adjust pygame.draw.circle(screen, self.color, p.asInt(), self.radius)
and this in entity.py, replacing ‘screen.blit’
def render(self, screen): if self.visible: if self.image is not None: adjust = Vector2(TILEWIDTH, TILEHEIGHT) / 2 p = self.position - adjust screen.blit(self.image, p.asTuple()) else:
The sketch lines are now gone, leaving us with a pristine maze graphic. Our only flaw is the characters look kinda off-center. The last 2 additions we made were supposed to fix that, but it’s still off. This is another issue I’m gonna let stay.
Animate Pacman
Now we’re gonna turn Pacman from a basic yellow circle to his famous appearance; which is still the circle, just with an opening.
Create an animation.py file
from constants import *class Animator(object): def __init__(self, frames=[], speed=20, loop=True): self.frames = frames self.current_frame = 0 self.speed = speed self.loop = loop self.dt = 0 self.finished = False def reset(self): self.current_frame = 0 self.finished = False def update(self, dt): if not self.finished: self.nextFrame(dt) if self.current_frame == len(self.frames): if self.loop: self.current_frame = 0 else: self.finished = True self.current_frame -= 1 return self.frames[self.current_frame] def nextFrame(self, dt): self.dt += dt if self.dt >= (1.0 / self.speed): self.current_frame += 1 self.dt = 0
Add these to sprite.py
from animation import Animatorclass PacmanSprites(Spritesheet): def __init__(self, entity): ... self.animations = {} self.defineAnimations() self.stopimage = (8, 0)def defineAnimations(self): self.animations[LEFT] = Animator(((8,0), (0, 0), (0, 2), (0, 0))) self.animations[RIGHT] = Animator(((10,0), (2, 0), (2, 2), (2, 0))) self.animations[UP] = Animator(((10,2), (6, 0), (6, 2), (6, 0))) self.animations[DOWN] = Animator(((8,2), (4, 0), (4, 2), (4, 0))) def update(self, dt): if self.entity.direction == LEFT: self.entity.image = self.getImage(*self.animations[LEFT].update(dt)) self.stopimage = (8, 0) elif self.entity.direction == RIGHT: self.entity.image = self.getImage(*self.animations[RIGHT].update(dt)) self.stopimage = (10, 0) elif self.entity.direction == DOWN: self.entity.image = self.getImage(*self.animations[DOWN].update(dt)) self.stopimage = (8, 2) elif self.entity.direction == UP: self.entity.image = self.getImage(*self.animations[UP].update(dt)) self.stopimage = (10, 2) elif self.entity.direction == STOP: self.entity.image = self.getImage(*self.stopimage) def reset(self): for key in list(self.animations.keys()): self.animations[key].reset()
And update his sprites in pacman.py
def update(self, dt): self.sprites.update(dt) self.position += self.directions[self.direction]*self.speed*dt ...
Pacman now moves his mouth.
Animate Ghosts
define them in sprites.py
def update(self, dt): x = self.x[self.entity.name] if self.entity.direction == LEFT: self.entity.image = self.getImage(x, 8) elif self.entity.direction == RIGHT: self.entity.image = self.getImage(x, 10) elif self.entity.direction == DOWN: self.entity.image = self.getImage(x, 6) elif self.entity.direction == UP: self.entity.image = self.getImage(x, 4)
and add this line to the update method in ghosts.py
def update(self, dt): self.sprites.update(dt) self.mode.update(dt)...
Add this to sprites.py
def update(self, dt): x = self.x[self.entity.name] if self.entity.mode.current in [SCATTER, CHASE]:...elif self.entity.direction == UP: self.entity.image = self.getImage(x, 4) elif self.entity.mode.current == FREIGHT: self.entity.image = self.getImage(10, 4) elif self.entity.mode.current == SPAWN: if self.entity.direction == LEFT: self.entity.image = self.getImage(8, 8) elif self.entity.direction == RIGHT: self.entity.image = self.getImage(8, 10) elif self.entity.direction == DOWN: self.entity.image = self.getImage(8, 6) elif self.entity.direction == UP: self.entity.image = self.getImage(8, 4)
The ghosts’ eyes now move in the direction they’re going in.
Pacman Death
Now onto the iconic death animation. I have to say again that this is the main game-breaking flaw that I couldn’t figure out in time. The animation happens, but the game crashes when he dies. So you technically only get one life to play this.
One main difference with this animation compared to the others is that it doesn’t loop. We only need it to occur once and allow the game to move on. To do this, we add these to sprites.py. This a
...DEATH = 5 def defineAnimations(self):...self.animations[DOWN] = Animator(((8,2), (4, 0), (4, 2), (4, 0))) self.animations[DEATH] = Animator(((0, 12), (2, 12), (4, 12), (6, 12), (8, 12), (10, 12), (12, 12), (14, 12), (16, 12), (18, 12), (20, 12)), speed=6, loop=False)def update(self, dt): if self.entity.alive == True:...elif self.entity.direction == STOP: self.entity.image = self.getImage(*self.stopimage) else: self.entity.image = self.getImage(*self.animations[DEATH].update(dt))
this in pacman.py
    def reset(self):
...
self.alive = True
        self.image = self.sprites.getStartImage()
self.sprites.reset()run.py, take out ‘self.pacman.update’
    def update(self):
...
self.checkFruitEvents()

        if self.pacman.alive:
            if not self.pause.paused:
                self.pacman.update(dt)
        else:
            self.pacman.update(dt)
        afterPauseMethod = self.pause.update(dt)
Pacman now has a death animation. Still can’t reset after he dies though.
Level Flash
in run.py
 class GameController(object):
    def __init__(self):
...
self.background = None
        self.background_norm = None
        self.background_flash = None
        self.clock = pygame.time.Clock()
...
self.lifesprites = LifeSprites(self.lives)
        self.flashBG = False
        self.flashTime = 0.2
        self.flashTimer = 0
take out the first 2 self.background
    def setBackground(self):
self.background_norm = pygame.surface.Surface(SCREENSIZE).convert()
        self.background_norm.fill(BLACK)
        self.background_flash = pygame.surface.Surface(SCREENSIZE).convert()
        self.background_flash.fill(BLACK)
        self.background_norm = self.mazesprites.constructBackground(self.background_norm, self.level%5)
        self.background_flash = self.mazesprites.constructBackground(self.background_flash, 5)
        self.flashBG = False
        self.background = self.background_norm
still run.py
 def update(self):
        ...
else:
            self.pacman.update(dt)

        if self.flashBG:
            self.flashTimer += dt
            if self.flashTimer >= self.flashTime:
                self.flashTimer = 0
                if self.background == self.background_norm:
                    self.background = self.background_flash
                else:
                    self.background = self.background_norm
        afterPauseMethod = self.pause.update(dt)

def checkPelletEvents(self):
        ...
            if self.pellets.isEmpty():
                self.flashBG = True
